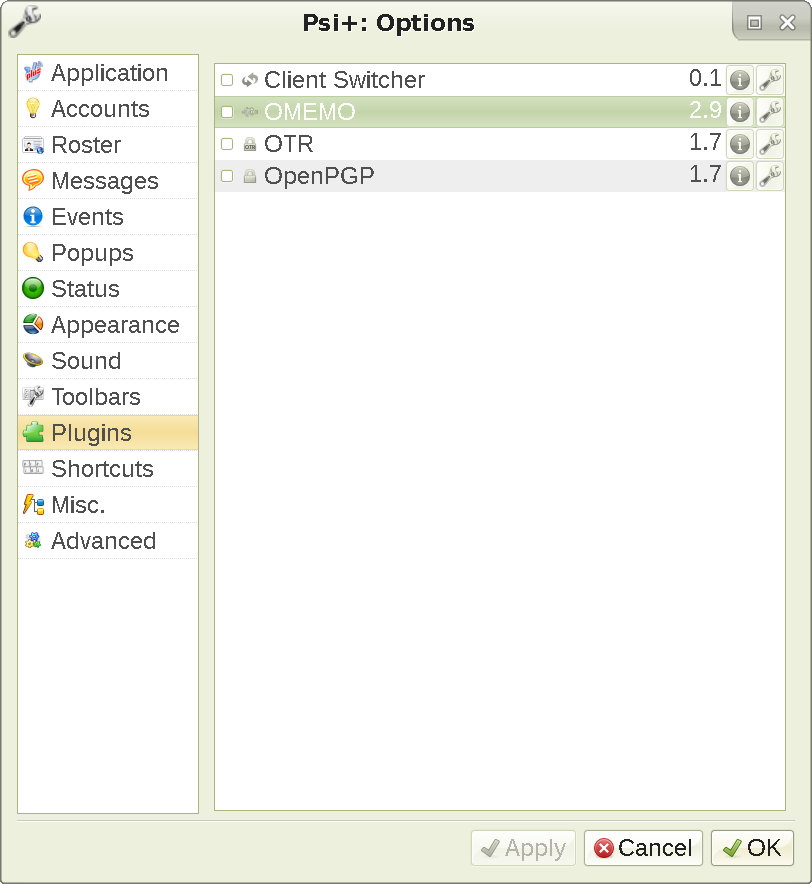
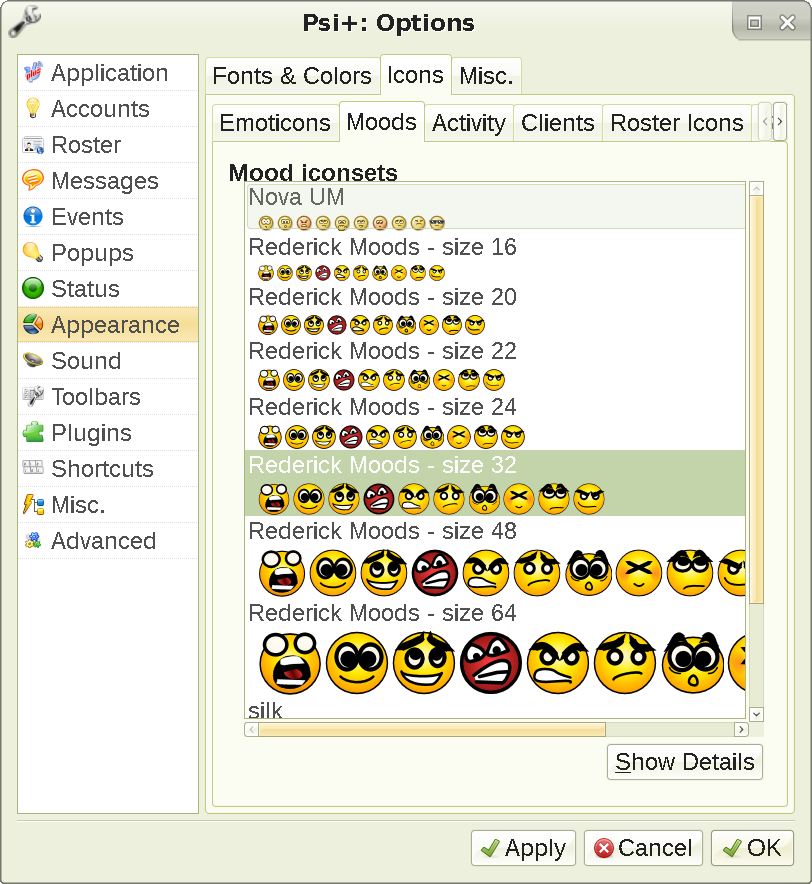
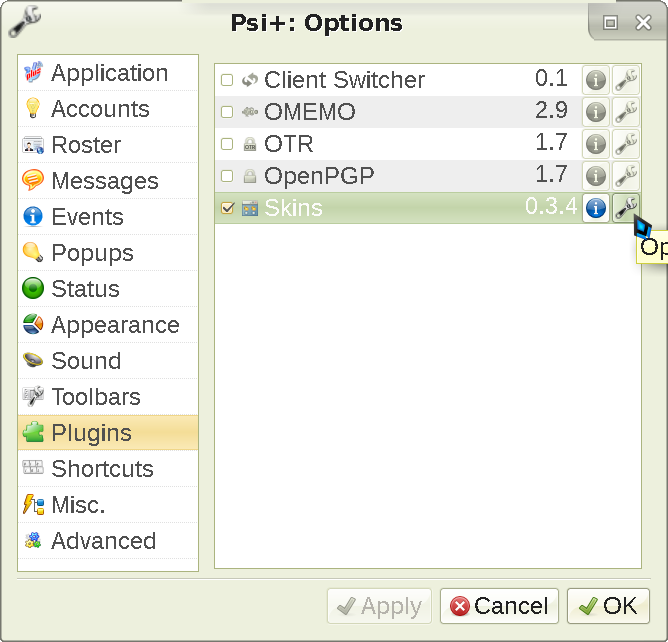
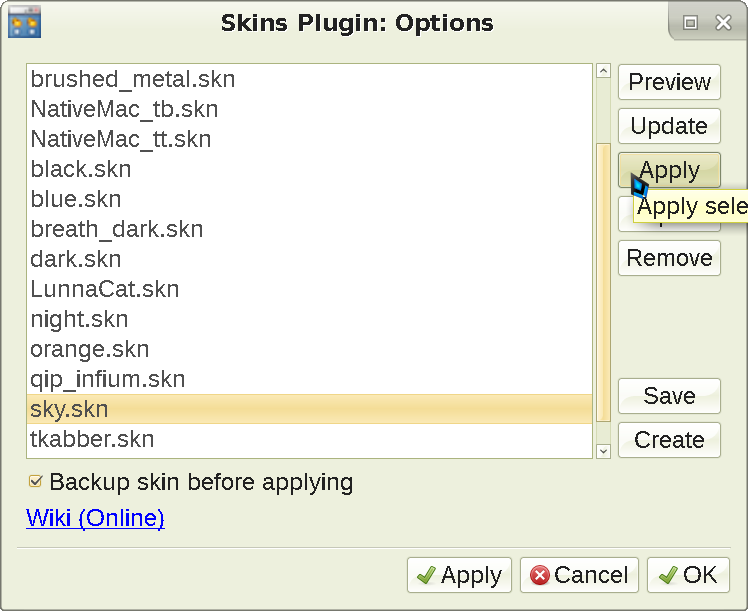
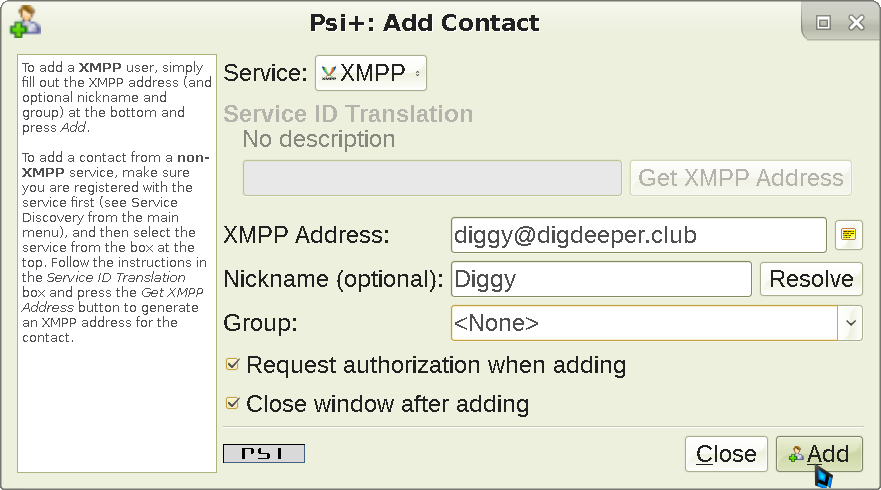
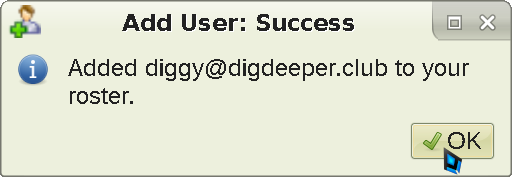
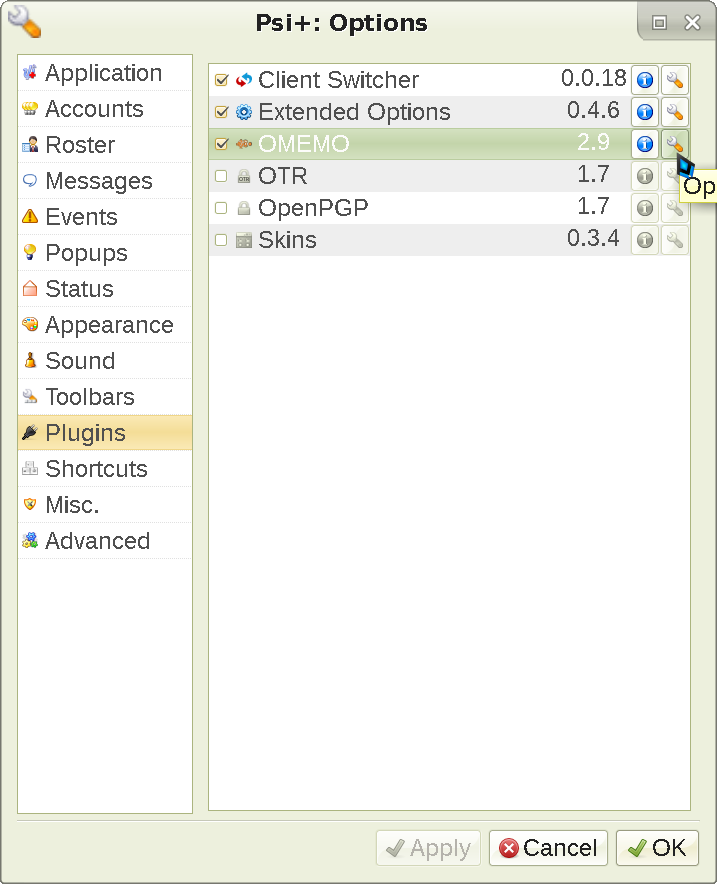
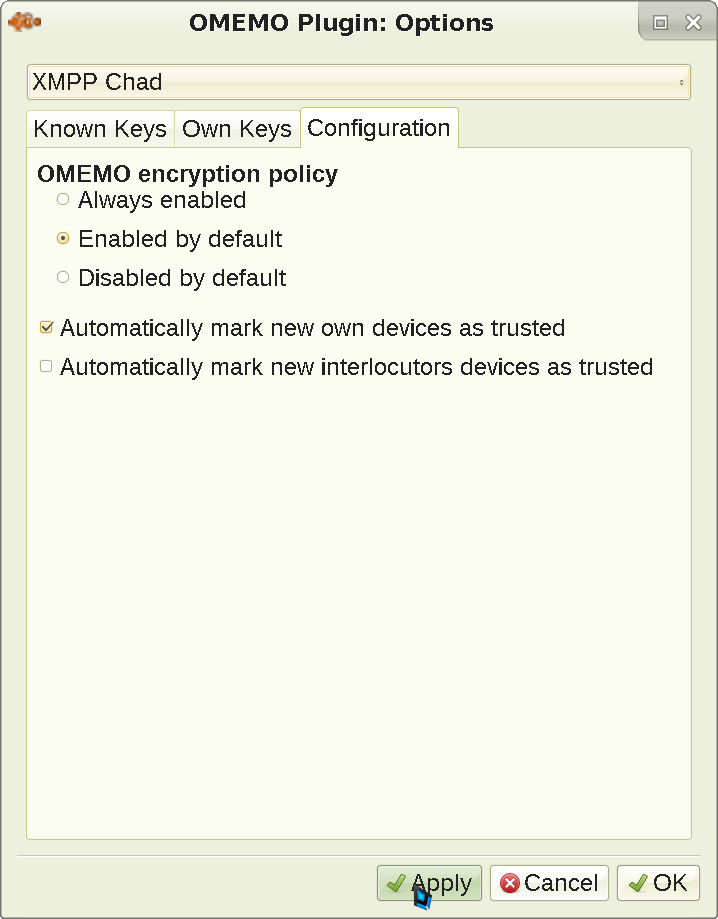
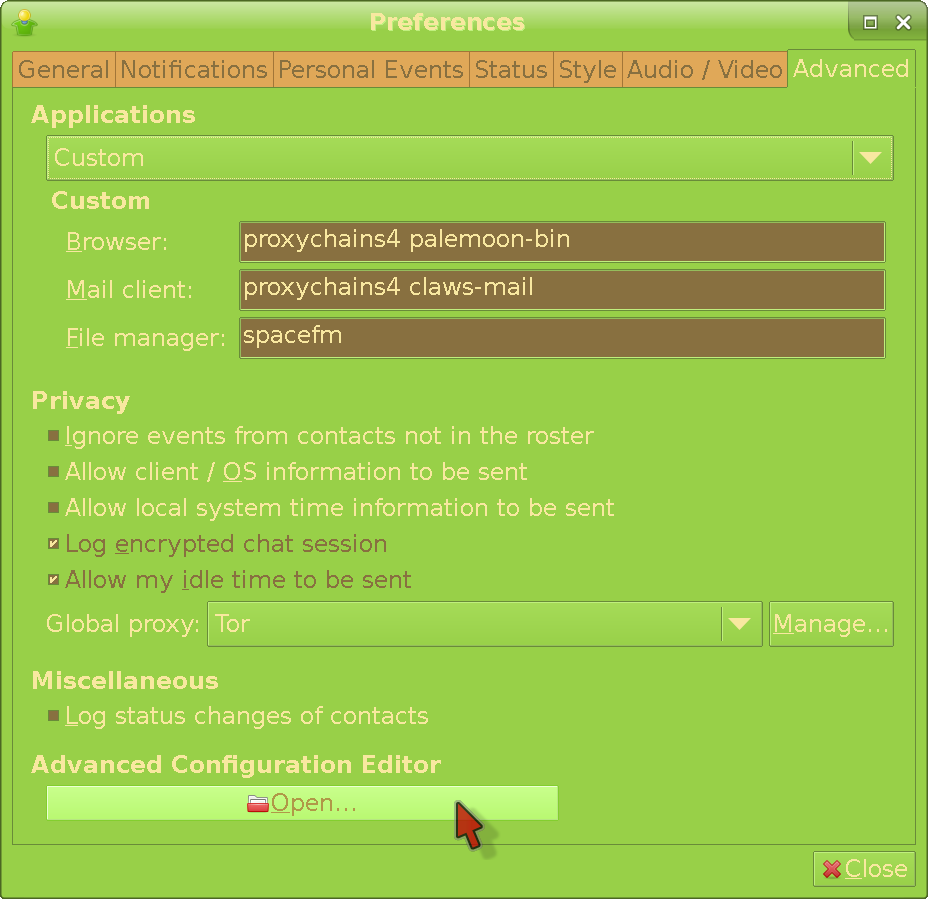
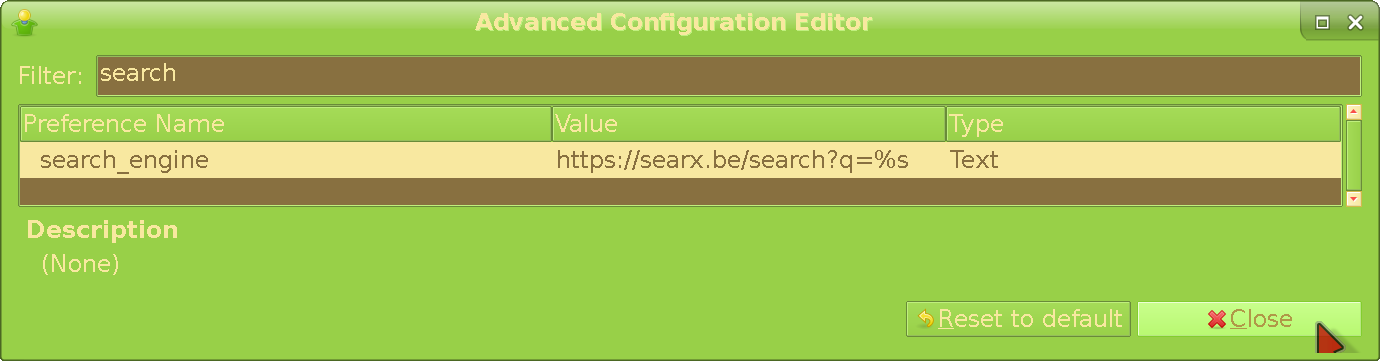
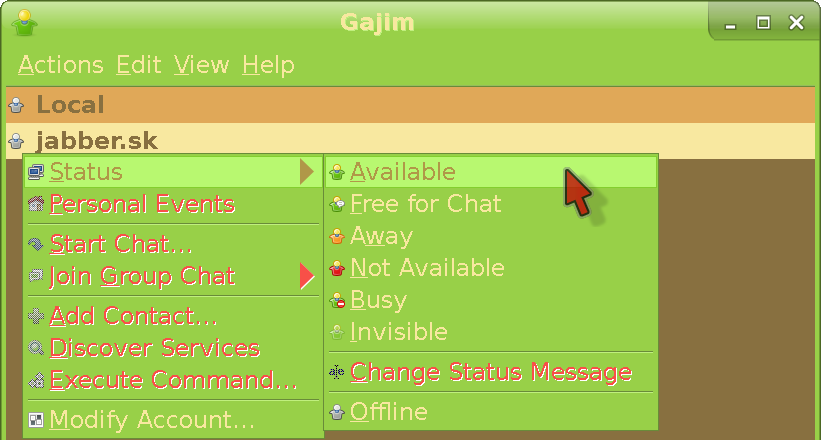
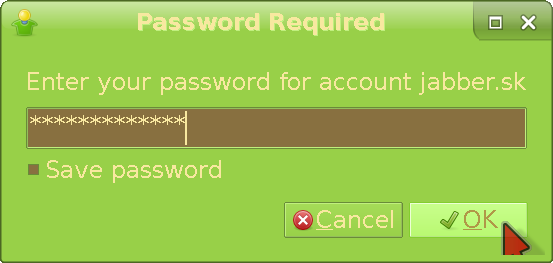
<?xml version="1.0" encoding="UTF-8"?>
<feed xmlns="http://www.w3.org/2005/Atom" xmlns:xhtml="http://www.w3.org/1999/xhtml"><generator uri="https://git.xmpp-it.net/sch/Focus" version="1.4">The Focus</generator><link rel="banner" type="image/png">https://digdeeper.love/images/button.png</link><logo>https://digdeeper.love/images/logo_animated.gif</logo><rights>DigDeeper</rights><icon>/favicon.ico</icon><title>XMPP clients - usage and mitigation</title>XMPP clients - usage and mitigation- Introduction -- Using XMPP - Psi+ -- Installing Psi+ -- Installing plugins -- Installing icons -- Installing skins -- Adding an account -- Filling personal information -- Going online -- Adding a contact -- Starting a conversation -- Setting up OMEMO encryption -- Privacy mitigations -- Using XMPP - Gajim 0.16.9 -- Introduction -- Installation -- Adding an account -- Privacy mitigations -- Going online -- Filling personal information -- Adding a contact -- Starting a conversation -- Setting up OMEMO encryption -- Other clients -- Pidgin -- Conversations -- Dino -- Profanity -- ChatSecure -- Summary -IntroductionUPDATE October 2022: I just thought I might turn this into a general XMPP guide. So let's go.XMPP is a communication protocol, which means you can use it as a replacement for Discord, Facebook, etc. for talking to people. But why do so? What are the advantages?You do not have to give personal data (such as a phone number or real name) to shady tech companies in order to use it.You can use it on every device and platform, e.g a smartphone or a computer with Linux, Windows, macOS, Haiku...It is just as easy (or even easier) to use as the usual communication "services" (as I'll show you in the next section).You can choose from the many clients available, instead of being chained to the officially supported one.You can host your own server, if you know how to - this means you have full control over its functioning, data storage, etc. If you don't want to, pick one out of the hundreds of available servers run by volunteers, instead of - again - being chained to the "official" one.The aforementioned decentralization (ability to choose client and server) means you are not dependent on a single entity to decide whether you're allowed to stay in or get kicked out. You can easily use multiple accounts, whereas e.g Facebook would discourage it. XMPP will never die, as long as there is at least one person hosting a server and some client still exists on the internet, even old versions (this is pretty much a certainty). FB, Discord, etc. will die the moment the companies running them go down.All the features you'd expect are available; adding friends, group chats, file uploading, voice / video calls, etc.You can easily encrypt your messages with the OMEMO plugin, which means a malicious middleman cannot spy on them.Okay, so I hope I have convinced you to switch (or at least use it in addition to the violating services). Let us check out just how easy it is (I will use the Psi+ client for this tutorial; you can install it on any operating system - Windows, Linux, macOS or Haiku). However, the same procedure with other clients (Dino, Gajim, Conversations...) is possible - though I will not cover it.Using XMPP - Psi+Installing Psi+Here I will show the method I have used for installing Psi+ on Slackware-based distros. For other ones, you can use the AppImage; and for Windows, the installers. These probably work, but are untested by me (Edit: the linked AppImage works, and has all the icons and plugins installed by default, but ignores qt5ct). Also, the AppImage has a broken version of Client Switcher; you could install an older AppImage, perhaps. But I will teach you a method in which everything works properly. You need Slackware 15 for this to work, as Psi+ versions 1.5+ require openssl 1.1.x - installing which would break older Slackware versions; they might also need newer binutils and / or glibc. Anyway let's begin:First, download the Psi+ source code from here by clicking on the tar.gz link. 1.5.1642 is the version I've used for the installation, though there are newer ones available now. You can also do it by typing wget https://github.com/psi-plus/psi-plus-snapshots/archive/1.5.1642/psi-plus-snapshots-1.5.1642.tar.gz into the terminal, where 1.5.1642 is the version. If using the wget command, you have to replace both instances of the version with the one you want to install, e.g https://github.com/psi-plus/psi-plus-snapshots/archive/1.5.9999/psi-plus-snapshots-1.5.9999.tar.gz if the version you want to install is 9999. Note the folder that you have downloaded the source to; we will assume it is /home/username/Downloads for the purposes of this guide.Now edit (sudo needed) the /etc/slapt-get/slapt-srcrc file and ensure that the line SOURCE=https://www.slackbuilds.org/slackbuilds/15.0/ is in there; if it's not - add it. Run the terminal command sudo slapt-src --update to recognize the newly added repository. Now download the Psi+ SlackBuild with sudo slapt-src --fetch psi-plus:1.5.1600. We are specifying the version because otherwise, an old script from different repos might be pulled, which is incompatible with new versions of Psi+. The SlackBuild will be downloaded to /usr/src/slapt-src/network/psi-plus. Move your Psi+ source code there with the command sudo mv /home/username/Downloads/psi-plus-snapshots-1.5.1642.tar.gz /usr/src/slapt-src/network/psi-plus (replace the version if you downloaded a newer one earlier, e.g 1644 instead of 1642).Now we will move to the slapt-src folder to perform operations there. So type cd /usr/src/slapt-src/network/psi-plus in the terminal. Edit the SlackBuild script to change the version that will be installed, since originally, it tries to install 1.5.1600 - and we're using a newer one. Type sudo leafpad psi-plus.SlackBuild (leafpad can be replaced with whatever text editor you are familiar with). Replace the line VERSION=${VERSION:-1.5.1600} with VERSION=${VERSION:-1.5.1642} (or 1644 or whichever other version of the source you have downloaded in the previous step). Type sudo sh psi-plus.SlackBuild to begin the compilation; it might take hours. After it's finished, the terminal will spit out something like Slackware package /usr/src/slapt-src/network/psi-plus/psi-plus-1.5.1642-x86_64-1_SBo.tgz created.. Type sudo installpkg /usr/src/slapt-src/network/psi-plus/psi-plus-1.5.1642-x86_64-1_SBo.tgz to install it. Oh, and remember to back it up so that you don't have to repeat the process later. E.g sudo cp /usr/src/slapt-src/network/psi-plus/psi-plus-1.5.1642-x86_64-1_SBo.tgz /home/username/Packages (directory needs to exist).And there we go, Psi+ has been installed. You can move on to the relevant section now to learn how to use it. You might be wondering, why not just use the command sudo slapt-src --install psi-plus and skip all the fluff? Because when I tried it, it didn't work at all - the compilation broke in the middle for reasons I couldn't debug. This method works perfectly, and you can install whichever version you want with it. And it's better to know how to do stuff more manually, anyway. Plugins are not installed this way - we have to do that separately which I will show how to right now:Installing pluginsBecause the SlackBuild does not do that by default, we have to do it manually again. Slapt-src extracts all compiled sources to /tmp/_SBo/, but since Psi+ itself was already compiled, we're only interested in the sources for plugins (which are also contained in the Psi+ source snapshots). Type the command cd /tmp/_SBo/psi-plus-snapshots-1.5.1642/plugins/, which is where they are stored. Make a new directory where the actual plugins will be created (type sudo mkdir build for example). Now type cd build and then sudo cmake ../ -DBUILD_PLUGINS= "omemoplugin;openpgpplugin;otrplugin;clientswitcherplugin" -DPLUGINS_PATH= "" -DCMAKE_INSTALL_PREFIX= "". -DBUILD_PLUGINS decides which plugins will be installed; we're choosing the three encryption plugins and the one that allows you to disable data leaks - but you can add any other that exist in /tmp/_SBo/psi-plus-snapshots-1.5.1642/plugins/generic (or just delete the whole -DBUILD_PLUGINS part, which will install them all). You can add any other plugins later though; just repeat the process with other names in the -DBUILD_PLUGINS section (e.g skinsplugin if you want to install skins); I am not familiar with all the plugins so you will have to check what they do for yourself. The paths are defined because for some reason, cmake randomly adds stuff in there, and you want the plugins installed right into the directory which Psi+ reads from, without useless additions (remove the path definitions and you will see what I mean). Now type sudo make then when that finishes, sudo make install DESTDIR= "/usr/share/psi-plus/plugins" (if you hadn't defined the paths earlier, the plugins would be stuck in a folder Psi+ doesn't check, and would be unavailable for use). That's it! You should be able to see them in the Psi+ Options menu like this:WARNING: okay fuck, it seems that the new (0.1) version of Client Switcher lacks important functionality. You will have to compile one from an older Psi+ source code (1.4.1460 works) or download the binary I've compiled (shove that into /usr/share/psi-plus/plugins). Why do devs have to destroy things that work fine? And after 7 years of absence, as well...No matter, 0.018 works perfectly.Installing iconsThe SlackBuild doesn't do that by default, either. Go to the build directory (cd /tmp/_SBo/psi-plus-snapshots-1.5.1642, replacing the version if necessary). Then copy the iconsets directory into where Psi reads its icons from (sudo cp -R iconsets /usr/share/psi-plus/). If you did it right, you will be able to see them in the options screen:Installing skinsYou need to have installed the skins plugin in the Plugins section for this to work. If you have done so, type cp -R /tmp/_SBo/psi-plus-snapshots-1.5.1642/skins /usr/share/psi-plus. This is the same exact process as with icons - just copying the skins from the Psi+ source folder to the one Psi+ actually reads them from. Enable the Skins plugin in the plugin window, and enter its settings like this:Pick a skin and apply it (ensure the Backup skin before applying option is enabled, which will allow you to restore your previous configuration later):This is the Night skin (some can change more, like fonts etc. it seems):Anyway, if you're done installing plugins, icons, and skins, you can burn the build folder (sudo rm -R /tmp/_SBo/psi-plus-snapshots-1.5.1642) to not leave litter around.Adding an accountWhen you turn on Psi+, this screen will appear:To use XMPP, you need to register an account first. Press the Register new account button as shown, and the screen will switch to this:I am using jabber.cz for our server, but you can choose any other from the list. However, there is no guarantee all the functionality will be available on every server. Click Next and the screen will change again:Input your desired username (this can be anything) in the relevant field, as well as a strong password (16+ characters that are not easily guessable like birth dates or your kids' names). You might be asked to solve a captcha, so type the number in the picture into the last field. Then click Next, and our registration is finalized:Filling personal informationYou can fill the User Info, but don't have to:Click Publish (if you did fill it), then Close. Your server - as well as everyone who you add to your friends list or is in the same group chat - will be able to see this information, but no real data has to be submitted at any point (you can leave all the fields empty, if you want to, as well).Going onlineRight click your username, and change your status to Online:Adding a contactClick the Psi logo at the bottom left, and add a contact:You will need the XMPP address of your friend, and whatever name you want to call them with. Here is an example filled with my details:When you click Add, this will appear:Your friend (me in this case) will get a friend request, which they will have to approve so that you will get added to their friends list. Though this isn't strictly necessary to message someone (you can do so while knowing only their address), it will allow you to see each others' status (online, away, etc) as well as set up encryption later.Starting a conversationDouble-click on your friend's name to bring up the talk window:Type whatever you want in the bottom field, and press Enter to send. That's it for the basics (I told you it was easy).Setting up OMEMO encryptionOMEMO is message-level encryption, which means no one other than the intended recipient can read your message - not even the XMPP servers you or your contact are using. To activate it, go to the Plugins menu, enable it and go to its settings like this:The screen will change. Go to the Configuration tab and enable OMEMO by default:This will prevent sending unencrypted messages unless you explicitly choose to - but will still allow you to do so when talking with clients that don't support OMEMO. This is the sanest default possible. In some Psi+ versions, it might also be needed to move the OMEMO fish to the message window (Toolbars, then click OMEMO and press the right arrow) so that you get a notification of whether OMEMO is active, and are able to view and approve / deny your interlocutor's fingerprints. Now Apply and leave the menu, and let's finally try to message someone:We see the OMEMO toggle is lit up, yet the prompt shows us that the OMEMO encryption is not available. Here is what happens when we send a message in that case:This message won't be received by your intended recipient. This is because they need to verify your fingerprint before the encrypted conversation can proceed. This is a security feature that's intended to prevent MitM attacks - If a client were to opportunistically start using sessions for sending without asking the user whether to trust a device first, an attacker could publish a fake device for this user, which would then receive copies of all messages sent by/to this user. Ideally, everyone should be publishing their OMEMO fingerprints on a website or elsewhere, so that they could be compared to the one your XMPP client shows (I do that here). The reason it needs to be done out of band (as in, outside of the current communication channel, which in this case is the XMPP conversation) is that presumably the possible attacker does not control the other place, as well. The point is to have something trustworthy to verify the shown fingerprint against. Imagine if you tried to compare the fingerprint to a message sent through XMPP itself. If the attacker substituted a fake device, they could just as well insert a fake message (The fingerprint XX XX XX that has just appeared to you is totally real, bro), and pretend the shown key is real. Of course - again - your recipient needs to have an outside channel for this to matter in the first place. Anyway, once your interlocutor verifies your fingerprint like this:If you try to type an encrypted message again, this happens (re-logging might be necessary):Before you trust the fingerprint, verify it's the same as the one shown on my site. Of course, if your recipient does not provide their authentic fingerprint anywhere else, you cannot do that and must accept (which is less secure, but still much more than sending messages without OMEMO; you'd need to be a victim of a targeted attack right at the point of the first key exchange for it to matter) or deny it blindly. Verifying the fingerprints out of band is a good habit to have if your OPSEC requirements are high, though. Okay, now the encrypted conversation can finally proceed:Now, remember the OMEMO plugin settings menu, and the Automatically mark new interlocutors devices as trusted option? Well, in light of the above explanations, you should understand this option as simply skipping the fingerprint verification - and realize how insecure it is. That's why we keep it unchecked. Some clients do this by default, by the way - it's called TOFU (Trust On First Use), and again - it's not secure, allowing undetectable MitM.Privacy mitigationsPsi+, by default, reveals your timezone, client (version and creation date), and system information (OS / Linux distro version + kernel version). The way to mitigate it is by using the plugin Client Switcher. Choose not implemented as the Response mode. Then mark Deny iq time request (this disables the timezone leak). Finally, you need to Enable forContacts and Groupchats (self-explanatory). This will show Unknown for all categories when inspected. You can also falsify your client and system info - only Psi+ can do that (not shown in this example though).Every client still reveals a Resource header to group chat admins and all roster contacts, and in Psi+ that contains your hostname (what you see when you type hostname in the terminal) by default, which can be sensitive. To disable that, go to the accounts screen, and click Modify:You can change it to whatever, but remember that Gajim and Psi+ are the only clients that are able to modify the resource header and not leak anything else, so your contacts will know you're using one of those two, either way. You can also pretend to be Dino by setting your Resource header in the format of dino.+8 numbers and letters. E.g dino.cfg231e9. Save after, and re-login.Results in this when inspected by a contact or group chat member:Using XMPP - Gajim 0.16.9IntroductionUPDATE April 2023: I guess it is fitting to post a guide for the client I actually daily drive. Version 0.16.9 includes all relevant features (but no bloat unlike Psi+), a good UI (it is the only usable client still compatible with gtk2) and OTR support (nuJim dropped that and won't bring it back - The plugin won't work with Gajim &gt;= 1.0 as it was not ported to python3. There is no port planned.). The reason OTR support is important is because there are clients out there (e.g mcabber) that do not support OMEMO but do OTR, and the lack of it would prevent encrypted communication with them. There are no known  security issues with this version, either. Newer versions have increasingly become more Discord-like with nothing else to justify them; you can read the complaints on the internet - but in this guide, we'd rather be focusing on something good which is Gajim 0.16.9.InstallationTo install Gajim 0.16.9 in Slackware 14-based distros, you need these packages:asn1crypto-0.24.0at-spi2-atk-2.18.1gajim-0.16.9gnome-python-2.28.1idna-2.6ipaddress-1.0.16libunistring-0.9.10notify-python-0.1.1protobuf-2.6.1pyOpenSSL-0.15.1pyasn1-0.1.9pyasn1-modules-0.0.8pycrypto-2.6.1pycurl-7.43.0pygobject-2.28.6pygtk-2.24.0python-axolotl-0.1.39python-axolotl-curve25519-0.1python-cffi-1.5.2python-cryptography-1.3.1python-enum34-1.1.2python-nbxmpp-0.6.2python-six-1.11.0service_identity-14.0.0Versions need to match at least for some of them. Newer e.g pyOpenSSL will be undetected, while other mismatches might make Gajim fail with different random errors. I've spent hours (and a handful of pulled hair) hunting down this exact set of dependencies, and I know it works; if you want to try another, you're on your own (have fun digging through the useless or even misleading errors Gajim will spit). This applies only to Slackware 14.2; you can still run this program on 15, but the requirements are a little different - cffi changes to 1.13.2; enum34 to 1.1.10 or higher; idna to 2.9 or higher; pyasn1 to 0.4.4; pyasn1-modules to 0.2.2; cryptography to 3.3.2; pygobject to 2.28.7; pyOpenSSL to 21.0.0 or higher; and six to 1.14.0 or higher. UPDATE October 2025: The needed axolotl versions seem to be missing from repos completely now; I think the support for 0.16.9 is dying. All the deps take about 10mb compressed; while for Psi+, qt5 alone (plus the stuff it pulls) is over 100mb compressed and over 600mb uncompressed. Gajim 0.16.9 is contained in e.g the Ponce's repository, or you can use slapt-src (remember the no-dep option or it will pull some BS deps). This client can also be installed on 32-bit versions of Slackware. Anyway - assuming the installation went successfully - let's dive right in and register an account (you can do it inside the client itself):Adding an accountEnter the menu shown, and the screen will switch to this:Click Add here.Pick the relevant option and click Forward.In this screen we choose the server our account will be on. We will use jabber.sk for this guide, but you can pick any other. Keep in mind they all have different properties; some might block TOR, in-band (client) registration or lack certain features. Anyway, jabber.sk does allow us to sign-up through the client while using TOR; if you want to do that, just expand Advanced and set it as the proxy (this is an in-built option in Gajim). Remember you need to have TOR running on your machine in the first place for it to work. You can leave the proxy empty but will be revealing your IP to the server, then (unless using a system-wide VPN). Click Forward as usual.Insert the username and password that you want to have (the latter you can change later). Then, type in the number you see in the displayed image into the captcha (last) field; not all servers require this. If the registration was successful (e.g you didn't take too long to fill the captcha), the screen will change to this:Privacy mitigationsWe're going to do some privacy mitigations for Gajim now. I will assume here you are using a TOR-only setup and want everything to go through it. Enter the Preferences menu:Now switch to the Advanced tab and set everything like this:We're setting custom applications so that whenever someone posts a website or E-mail link in a chat - and you click it - Gajim will open it through TOR instead of in the clear which would reveal your IP address. This requires proxychains to be installed and setup in the first place. Of course, if you're using something other than Claws Mail and Pale Moon, input those instead (but keep the proxychains4 part).We're setting TOR as the global proxy, for obvious reasons. This means every account - even ones made after this - will use it. Disabling Allow client / OS information to be sent as well as Allow local system time information to be sent prevents Gajim from leaking data which it does by default. An important to note fact is that Gajim retardedly regenerates the leaks upon the creation of every new account, so you will have to disable them again every time you create one. Don't close the Preferences menu yet and instead open the Advanced Configuration Editor.By default - when you right click on a selection and choose the Web Search for It option - Gajim will send your query to Google (ugh). Find the search_engine preference, click the Value part and change it to your favorite SearX instance, or even something like Qwant Lite with https://lite.qwant.com/?q=%s. Press Enter and finally Close.Going onlineWe can go online now. Right click your account name and change your status to Available. Then the screen will change to this:Enter the password you've set before and click OK. If you want to login automatically on launch, you can mark the Save password option. I don't like it because it exposes you to local attack, e.g by a girlfriend. Anyway, we're going to set up our profile now (this step is completely optional):Filling personal informationEnter the Accounts menu again, but this time switch to the Personal Information tab:Click Edit Personal Information and the screen will change to this:Everyone you add to your friend list or enter a group chat with will be able to see this information, so be careful of what you put there; you can also leave it empty. Some of this data is also automatically inserted into your subscription message for whenever you add someone to your roster. To be perfectly clear, you do not have to fill in any of this. But if you did, click OK to publish the information and let's finally add a contact:Adding a contactEnter this menu and the screen will change to this:Jabber ID is the XMPP address of your friend. Nickname can be anything you want, but better leave it as something that will remind you of the person you're adding. The subscription message at the bottom is what your contact will see when they login and receive the friend request (it's the default, and fills in the info you've put in the Personal Preferences menu, as you can see). We will leave the Group empty since it's not necessary. When you send the friend request, this is what your recipient will see:If they accept, you will see this:Starting a conversationDouble-click your friend's nickname in the roster window...and the talk window will appear:You can type messages in the bottom field, and send them by clicking Send or just pressing Enter.The above is what your recipient will see.Setting up OMEMO encryptionGo to Edit -&gt; Plugins -&gt; Available and set the checkmark near OMEMO, then click Install / Upgrade on the right. You will get a security warning because Gajim won't be able to verify the cert; if you're worried you can download the zip from their site with your browser, which I have also mirrored locally just in case they deprecate the older version's plugins. After that, the procedure is similar to the Psi+ one. Just message someone with OMEMO enabled and a list of fingerprints will appear, then accept (first confirm out of band if possible). By the way, you need to add someone to your roster for Gajim to receive the "device list" and display the fingerprints. But, you can revoke the subscription later and keep using OMEMO with someone who is no longer in your roster. However, if that person gets a new fingerprint, you won't be able to receive it and will have to re-add them. This is the case in even the newest Gajim versions it seems. UPDATE February 2026: and - if someone gets a new fingerprint, and you send an OMEMO-encrypted message before accepting it - it won't reach the target. This probably works different in TOFU clients, but the way Oldjim does it, is more secure. Just telling you this so that you are not surprised if - at some point - you sent a message to someone but they act like they didn't receive it.Other clientsPidginDoubles as a client for IRC and some other protocols. I really like the UI, which relies on GTK2. Leaks your client and version (for example, Pidgin 2.11.0 (libpurple 2.11.0)) and timezone, but not system info unlike Psi+ (it shows up as Unknown); these leaks also cannot be disabled. Supports OTR and OMEMO, but the OMEMO plugin is terminal-based and sucks (cannot accept or remove fingerprints). Decent program in terms of design, but due to the data leaks and bad OMEMO support, cannot be recommended. However, if you really want to use Pidgin, you can nullify the timezone leak by changing the system's timezone; this does not fully prevent it, just displays a fake value. This way will also affect other things in your system, like the clock. Edit: on Windows, RunAsDate can be used to spoof the timezone. Pidgin cannot connect to onion domains, failing with the SSL handshake failed error - regardless of any settings. Yet another significant flaw, which means Gajim is superior unless you need the other prococols. Pidgin does not support message editing either, showing the modified messages as new ones:ConversationsLeaks client and version (for example, Conversations 2.10.2+fcr) plus timezone and the fact that it's on Android (but no specific system info). This applies to all the Conversations family (blabber etc). Using them through TOR prevents the timezone leak, but still leaks everything else. All Android XMPP clients auto-invite you to group chats, leading to easy trolling. There is no way to mitigate any phone client in full unless you use Diggy's black magic. Usability wise, compared to ChatSecure, It's a little clunky... Scrolling and menu changes jump around and switching between group and one on one chats is horrendous. I also have to go through two sub sections to change OMEMO settings to blindly accept or save or reject. With ChatSecure I could look at OMEMO keys in each chat. Conversations requires me to go out of chat to main settings and then a sub configuration menus. Just tedious. I don't get any indication on your status. ChatSecure had a green ring around each avatar when someone was online and how many hours ago. For something more positive, ChatSecure never told me when someone left but Conversations actually did with a visual change too.DinoDoes not leak timezone, client version, or system information. Does leak its name in the resource header - this means that all clients expose it, instead of just Psi and Gajim. UPDATE May 2022: new version has multiple account support and MUC invitations, so it's not as useless now. It is still pretty barren if you look at the screenshots - almost like a phone client brought to desktops. Cannot connect to onions. GTK3 dependence. No OTR; does support OMEMO well though.ProfanityTerminal-based. Can disable leaked system info and timezone, but not the client and version. UPDATE October 2023: someone mentioned that it is possible to do so now. UPDATE: people have told me OMEMO does not work properly in it when talking with other clients such as Dino. UPDATE 2: I got told that it is hard to recognize you have been mentioned (quoted) when you have been away for a few hours. UPDATE November 2022: SomeH4x0r just reported more issues, I will just quote him straight up. It doesn't display why it fails to connect and I just have to repeat /connect until it works. Also, I talked with a person with a long address, and it turned out it strips parts of their messages (the sender address can also be stripped). I tried to talk to another person with *the same* client (Profanity). OMEMO failed to see the keys on both sides.ChatSecureAn open source and fully available on GitHub for the IOS App. Unfortunately it's designed specifically and only for IOS mobile devices which are inherently insecure due to the need for Apple's store, and their proprietary data collection methods that cannot be mitigated. In addition to a myriad of privacy risk with using wifi and cellular data plans, Apple's proprietary exclusivity to everything really. Compared to the Android clients, ChatSecure does not reveal its version, timezone, or system information - only the client name in the resource header; this makes it one of the best in terms of data leaks. Notable features that give it some grace:ChatSecure supports OTR. Not auto-joining group chats or auto accepting OMEMO keys. Has the ability to OMEMO group chats on a per chat basis. ChatSecure also lets users reject or save new OMEMO keys. If you and a friend have not chatted for a while a default message appears and encourages you to verify who you are messaging. Users can also enable auto chat delete when disconnecting and manage downloaded media. Also configuration options for pinned certificates to manage saved SSL Certs. It grants users to add multiple accounts and edit their server information too. It appears to work cross client well too with users using older versions and current production versions. Ironically it lacks the basic copy and paste ability (big frustration with other languages). It is easy for anyone but lacks many features that are necessary for the goal of XMPP/OMEMO, such as MUC whispers. Oh, and you can't disable typing notifications, so your interlocutor will always know the exact moments you are typing, or stopping, and then resuming...Written by an anonymous author, who also provided these screenshots:SummaryPsi+ is the only client that is able to hide its identity - all other clients can be exposed by Psi+ and Gajim even after attempted mitigations. If you care about client concealement, then you have to use Psi+. Also, when I refer to the resource header, that can only be seen by MUC admins. The most important leak is the timezone, and it can be mitigated in all clients except Pidgin - so don't use it. All Android clients leak timezone unless used through TOR; they also reveal their versions. Profanity can hide everything except its name and version. ChatSecure leaks only the client name, but requires an iPhone to use it. Dino and Gajim (after mitigation) leak only the client name. I did not review any clients that don't support OMEMO, as that is the encryption that is expected today. Even though OTR is a good replacement, and isn't weaker in any relevant way - I can't justify recommending clients that don't support OMEMO, since they won't be able to have encrypted communication with popular clients that have now dropped OTR (e.g nuGajim). All clients can leak your country through your status messages, if they are in any other language than English. So, use English as your system language or turn off the messages. XMPP servers will always store your roster - the only way to avoid this is to not add anyone to the roster. Client / FeaturePsi+PidginConversationsDinoProfanityGajimChatSecureOMEMOYesPartialYesYesPartialYesYesOTRYesYesNoNoYesYes (old versions)YesPGPYes3rd party, didn't testYesYesYesYesNoMitigations for versionYesNoNoYesYesYesYesMitigations for timezoneYesNoExternal (TOR)YesYesYesYesMitigations for OSYesYesNoYesYesYesYesMitigations for client nameYesNoNoNoYesPartialPartialOnion connectivityYesNoYesNoYesYesNoOS support (official)Linux, Windows, macOS, Haiku, BSDLinux, Windows, FreeBSDAndroidLinux, BSDLinux, Windows, BSD, OSX, AndroidLinux, Windows, FreeBSDiOSBack to the front page<entry><author><email>digdeeper@disroot.org</email><name>DigDeeper</name><uri>xmpp:diggy@digdeeper.love</uri></author><content xmlns="http://www.w3.org/1999/xhtml" type="xhtml"><div class="section"><h2 id="intro">Introduction</h2><p><strong>UPDATE October 2022</strong>: I just thought I might turn this into a general XMPP guide. So let's go.</p><p>XMPP is a communication protocol, which means you can use it as a replacement for Discord, Facebook, etc. for talking to people. But why do so? What are the advantages?</p><ul><li><span class="list">You do not have to give personal data (such as a phone number or real name) to shady tech companies in order to use it.</span></li><li><span class="list">You can use it on every device and platform, e.g a smartphone or a computer with Linux, Windows, macOS, Haiku...</span></li><li><span class="list">It is just as easy (or even easier) to use as the usual communication "services" (as I'll show you in the next section).</span></li><li><span class="list">You can choose from the many clients available, instead of being chained to the officially supported one.</span></li><li><span class="list">You can host your own server, if you know how to - this means you have full control over its functioning, data storage, etc. If you don't want to, pick one out of the hundreds of available servers run by volunteers, instead of - again - being chained to the "official" one.</span></li><li><span class="list">The aforementioned decentralization (ability to choose client and server) means you are not dependent on a single entity to decide whether you're allowed to stay in or get kicked out. You can easily use multiple accounts, whereas e.g Facebook would discourage it. <strong>XMPP will never die</strong>, as long as there is at least one person hosting a server and some client still exists on the internet, even old versions (this is pretty much a certainty). FB, Discord, etc. will die the moment the companies running them go down.</span></li><li><span class="list">All the features you'd expect are available; adding friends, group chats, file uploading, voice / video calls, etc.</span></li><li><span class="list">You can easily encrypt your messages with the OMEMO plugin, which means a malicious middleman cannot spy on them.</span></li></ul><p>Okay, so I hope I have convinced you to switch (or at least use it in addition to the violating services). Let us check out just how easy it is (I will use the Psi+ client for this tutorial; you can install it on any operating system - Windows, Linux, macOS or Haiku). However, the same procedure with other clients (Dino, Gajim, Conversations...) is possible - though I will not cover it.</p></div></content><id>intro</id><summary type="html">&lt;i&gt;Section: Introduction&lt;/i&gt;&lt;hr/&gt;Context: UPDATE October 2022: I just thought I might turn this into a general XMPP guide. So let's go.</summary><title>Introduction</title></entry><entry><author><email>digdeeper@disroot.org</email><name>DigDeeper</name><uri>xmpp:diggy@digdeeper.love</uri></author><content xmlns="http://www.w3.org/1999/xhtml" type="xhtml"><div class="subsection"><h3 id="psi-install">Installing Psi+</h3><p>Here I will show the method I have used for installing Psi+ on Slackware-based distros. For other ones, you can use <a href="https://sourceforge.net/projects/psiplus/files/latest/download">the AppImage</a>; and for Windows, <a href="https://sourceforge.net/projects/psiplus/files/Windows/Personal-Builds/KukuRuzo/">the installers</a>. These probably work, but are untested by me (<strong>Edit</strong>: the linked AppImage works, and has all the icons and plugins installed by default, but ignores qt5ct). Also, the AppImage has a <strong>broken version of Client Switcher</strong>; you could install an older AppImage, perhaps. But I will teach you a method in which everything works properly. <strong>You need Slackware 15 for this to work</strong>, as Psi+ versions 1.5+ require openssl 1.1.x - installing which would break older Slackware versions; they might also need newer binutils and / or glibc. Anyway let's begin:</p><p>First, download the Psi+ source code from <a href="https://github.com/psi-plus/psi-plus-snapshots/tags">here</a> by clicking on the <q>tar.gz</q> link. 1.5.1642 is the version I've used for the installation, though there are newer ones available now. You can also do it by typing <q>wget https://github.com/psi-plus/psi-plus-snapshots/archive/1.5.1642/psi-plus-snapshots-1.5.1642.tar.gz</q> into the terminal, where <q>1.5.1642</q> is the version. If using the wget command, you <strong>have to replace both instances of the version with the one you want to install</strong>, e.g <q>https://github.com/psi-plus/psi-plus-snapshots/archive/1.5.9999/psi-plus-snapshots-1.5.9999.tar.gz</q> if the version you want to install is 9999. Note the folder that you have downloaded the source to; we will assume it is <em>/home/username/Downloads</em> for the purposes of this guide.</p><p>Now edit (sudo needed) the <em>/etc/slapt-get/slapt-srcrc</em> file and ensure that the line <q>SOURCE=https://www.slackbuilds.org/slackbuilds/15.0/</q> is in there; if it's not - add it. Run the terminal command <q>sudo slapt-src --update</q> to recognize the newly added repository. Now download the Psi+ SlackBuild with <q>sudo slapt-src --fetch psi-plus:1.5.1600</q>. We are specifying the version because otherwise, an old script from different repos might be pulled, which is incompatible with new versions of Psi+. The SlackBuild will be downloaded to <em>/usr/src/slapt-src/network/psi-plus</em>. Move your Psi+ source code there with the command <q>sudo mv /home/username/Downloads/psi-plus-snapshots-1.5.1642.tar.gz /usr/src/slapt-src/network/psi-plus</q> (replace the version if you downloaded a newer one earlier, e.g 1644 instead of 1642).</p><p>Now we will move to the slapt-src folder to perform operations there. So type <q>cd /usr/src/slapt-src/network/psi-plus</q> in the terminal. Edit the SlackBuild script to change the version that will be installed, since originally, it tries to install 1.5.1600 - and we're using a newer one. Type <q>sudo leafpad psi-plus.SlackBuild</q> (leafpad can be replaced with whatever text editor you are familiar with). Replace the line <q>VERSION=${VERSION:-1.5.1600}</q> with <q>VERSION=${VERSION:-1.5.1642}</q> (or 1644 or whichever other version of the source you have downloaded in the previous step). Type <q>sudo sh psi-plus.SlackBuild</q> to begin the compilation; it might take hours. After it's finished, the terminal will spit out something like <q>Slackware package /usr/src/slapt-src/network/psi-plus/psi-plus-1.5.1642-x86_64-1_SBo.tgz created.</q>. Type <q>sudo installpkg /usr/src/slapt-src/network/psi-plus/psi-plus-1.5.1642-x86_64-1_SBo.tgz</q> to install it. Oh, and remember to back it up so that you don't have to repeat the process later. E.g <q>sudo cp /usr/src/slapt-src/network/psi-plus/psi-plus-1.5.1642-x86_64-1_SBo.tgz /home/username/Packages</q> (directory needs to exist).</p><p>And there we go, Psi+ has been installed. You can move on to the relevant <a href="#psi-account">section</a> now to learn how to use it. You might be wondering, why not just use the command <q>sudo slapt-src --install psi-plus</q> and skip all the fluff? Because when I tried it, it didn't work at all - the compilation broke in the middle for reasons I couldn't debug. This method works perfectly, and you can install whichever version you want with it. And it's better to know how to do stuff more manually, anyway. <strong>Plugins are not installed this way</strong> - we have to do that separately which I will show how to right now:</p></div></content><id>psi-install</id><link rel="related" href="https://sourceforge.net/projects/psiplus/files/latest/download" title="the AppImage"/><link rel="related" href="https://sourceforge.net/projects/psiplus/files/Windows/Personal-Builds/KukuRuzo/" title="the installers"/><link rel="related" href="https://github.com/psi-plus/psi-plus-snapshots/tags" title="here"/><link rel="related" href="#psi-account" title="section"/><summary type="html">&lt;i&gt;Section: Using XMPP - Psi+&lt;/i&gt;&lt;hr/&gt;Context: Here I will show the method I have used for installing Psi+ on Slackware-based distros. For other ones, you can use the AppImage; and for Windows, the installers. These probably work, but are untested by me (Edit: the linked AppImage works, and has all the icons and plugins installed by default, but ignores qt5ct). Also, the AppImage has a broken version of Client Switcher; you could install an older AppImage, perhaps. But I will teach you a method in which everything works properly. You need Slackware 15 for this to work, as Psi+ versions 1.5+ require openssl 1.1.x - installing which would break older Slackware versions; they might also need newer binutils and / or glibc. Anyway let's begin:</summary><title>Installing Psi+</title></entry><entry><author><email>digdeeper@disroot.org</email><name>DigDeeper</name><uri>xmpp:diggy@digdeeper.love</uri></author><content xmlns="http://www.w3.org/1999/xhtml" type="xhtml"><div class="subsection"><h3 id="psi-plugins">Installing plugins</h3><p>Because the SlackBuild does not do that by default, we have to do it manually again. Slapt-src extracts all compiled sources to <em>/tmp/_SBo/</em>, but since Psi+ itself was already compiled, we're only interested in the sources for plugins (which are also contained in the Psi+ source snapshots). Type the command <q>cd /tmp/_SBo/psi-plus-snapshots-1.5.1642/plugins/</q>, which is where they are stored. Make a new directory where the actual plugins will be created (type <q>sudo mkdir build</q> for example). Now type <q>cd build</q> and then <q>sudo cmake ../ -DBUILD_PLUGINS= "omemoplugin;openpgpplugin;otrplugin;clientswitcherplugin" -DPLUGINS_PATH= "" -DCMAKE_INSTALL_PREFIX= ""</q>. <q>-DBUILD_PLUGINS</q> decides which plugins will be installed; we're choosing the three encryption plugins and the one that allows you to disable data leaks - but you can add any other that exist in <em>/tmp/_SBo/psi-plus-snapshots-1.5.1642/plugins/generic</em> (or just delete the whole <q>-DBUILD_PLUGINS</q> part, which will install them all). You can add any other plugins later though; just repeat the process with other names in the <q>-DBUILD_PLUGINS</q> section (e.g <em>skinsplugin</em> if you want to install skins); I am not familiar with all the plugins so you will have to check what they do for yourself. The paths are defined because for some reason, cmake randomly adds stuff in there, and you want the plugins installed right into the directory which Psi+ reads from, without useless additions (remove the path definitions and you will see what I mean). Now type <q>sudo make</q> then when that finishes, <q>sudo make install DESTDIR= "/usr/share/psi-plus/plugins"</q> (if you hadn't defined the paths earlier, the plugins would be stuck in a folder Psi+ doesn't check, and would be unavailable for use). That's it! You should be able to see them in the Psi+ <em>Options</em> menu like this:</p><img class="center" src="/images/psi_plugins.png" width="812" height="884" alt="Showing Psi plugins existing in the Options menu"/><p><strong>WARNING</strong>: okay fuck, it seems that the new (0.1) version of <em>Client Switcher</em> lacks important functionality. You will have to compile one from an older Psi+ source code (<a href="https://github.com/psi-plus/psi-plus-snapshots/archive/refs/tags/1.4.1460.tar.gz">1.4.1460</a> works) or download <a href="/others/libclientswitcherplugin.so">the binary I've compiled</a> (shove that into <em>/usr/share/psi-plus/plugins</em>). Why do devs have to destroy things that work fine? And after <a href="https://github.com/psi-im/plugins/blob/master/generic/clientswitcherplugin/changelog.txt">7 years of absence</a>, as well...No matter, 0.018 works perfectly.</p></div></content><id>psi-plugins</id><link rel="enclosure" href="/images/psi_plugins.png" title="Showing Psi plugins existing in the Options menu" type="image/png"/><link rel="related" href="https://github.com/psi-plus/psi-plus-snapshots/archive/refs/tags/1.4.1460.tar.gz" title="1.4.1460"/><link rel="related" href="/others/libclientswitcherplugin.so" title="the binary I've compiled"/><link rel="related" href="https://github.com/psi-im/plugins/blob/master/generic/clientswitcherplugin/changelog.txt" title="7 years of absence"/><summary type="html">&lt;i&gt;Section: Using XMPP - Psi+&lt;/i&gt;&lt;hr/&gt;Context: Because the SlackBuild does not do that by default, we have to do it manually again. Slapt-src extracts all compiled sources to /tmp/_SBo/, but since Psi+ itself was already compiled, we're only interested in the sources for plugins (which are also contained in the Psi+ source snapshots). Type the command cd /tmp/_SBo/psi-plus-snapshots-1.5.1642/plugins/, which is where they are stored. Make a new directory where the actual plugins will be created (type sudo mkdir build for example). Now type cd build and then sudo cmake ../ -DBUILD_PLUGINS= "omemoplugin;openpgpplugin;otrplugin;clientswitcherplugin" -DPLUGINS_PATH= "" -DCMAKE_INSTALL_PREFIX= "". -DBUILD_PLUGINS decides which plugins will be installed; we're choosing the three encryption plugins and the one that allows you to disable data leaks - but you can add any other that exist in /tmp/_SBo/psi-plus-snapshots-1.5.1642/plugins/generic (or just delete the whole -DBUILD_PLUGINS part, which will install them all). You can add any other plugins later though; just repeat the process with other names in the -DBUILD_PLUGINS section (e.g skinsplugin if you want to install skins); I am not familiar with all the plugins so you will have to check what they do for yourself. The paths are defined because for some reason, cmake randomly adds stuff in there, and you want the plugins installed right into the directory which Psi+ reads from, without useless additions (remove the path definitions and you will see what I mean). Now type sudo make then when that finishes, sudo make install DESTDIR= "/usr/share/psi-plus/plugins" (if you hadn't defined the paths earlier, the plugins would be stuck in a folder Psi+ doesn't check, and would be unavailable for use). That's it! You should be able to see them in the Psi+ Options menu like this:</summary><title>Installing plugins</title></entry><entry><author><email>digdeeper@disroot.org</email><name>DigDeeper</name><uri>xmpp:diggy@digdeeper.love</uri></author><content xmlns="http://www.w3.org/1999/xhtml" type="xhtml"><div class="subsection"><h3 id="psi-icons">Installing icons</h3><p>The SlackBuild doesn't do that by default, either. Go to the build directory (<q>cd /tmp/_SBo/psi-plus-snapshots-1.5.1642</q>, replacing the version if necessary). Then copy the <em>iconsets</em> directory into where Psi reads its icons from (<q>sudo cp -R iconsets /usr/share/psi-plus/</q>). If you did it right, you will be able to see them in the options screen:</p><img class="center" src="/images/psi_icons.png" width="812" height="884" alt="Showing Psi+ icons choosing screen"/></div></content><id>psi-icons</id><link rel="enclosure" href="/images/psi_icons.png" title="Showing Psi+ icons choosing screen" type="image/png"/><summary type="html">&lt;i&gt;Section: Using XMPP - Psi+&lt;/i&gt;&lt;hr/&gt;Context: The SlackBuild doesn't do that by default, either. Go to the build directory (cd /tmp/_SBo/psi-plus-snapshots-1.5.1642, replacing the version if necessary). Then copy the iconsets directory into where Psi reads its icons from (sudo cp -R iconsets /usr/share/psi-plus/). If you did it right, you will be able to see them in the options screen:</summary><title>Installing icons</title></entry><entry><author><email>digdeeper@disroot.org</email><name>DigDeeper</name><uri>xmpp:diggy@digdeeper.love</uri></author><content xmlns="http://www.w3.org/1999/xhtml" type="xhtml"><div class="subsection"><h3 id="psi-skins">Installing skins</h3><p>You need to have installed the skins plugin in the <a href="#plugins">Plugins section</a> for this to work. If you have done so, type <q>cp -R /tmp/_SBo/psi-plus-snapshots-1.5.1642/skins /usr/share/psi-plus</q>. This is the same exact process as with icons - just copying the skins from the Psi+ source folder to the one Psi+ actually reads them from. Enable the <em>Skins</em> plugin in the plugin window, and enter its settings like this:</p><img class="center" src="/images/psi_plugins_skins.png" width="668" height="642" alt="Showing the Skins plugin in the plugins menu"/><p>Pick a skin and apply it (ensure the <q>Backup skin before applying</q> option is enabled, which will allow you to restore your previous configuration later):</p><img class="center" src="/images/psi_skins_apply.png" width="748" height="611" alt="Applying a Psi skin"/><p>This is the Night skin (some can change more, like fonts etc. it seems):</p><img class="center" src="/images/psi_night.png" width="637" height="807" alt="Showing the Night skin"/><p>Anyway, if you're done installing plugins, icons, and skins, you can burn the build folder (<q>sudo rm -R /tmp/_SBo/psi-plus-snapshots-1.5.1642</q>) to not leave litter around.</p></div></content><id>psi-skins</id><link rel="enclosure" href="/images/psi_plugins_skins.png" title="Showing the Skins plugin in the plugins menu" type="image/png"/><link rel="enclosure" href="/images/psi_skins_apply.png" title="Applying a Psi skin" type="image/png"/><link rel="enclosure" href="/images/psi_night.png" title="Showing the Night skin" type="image/png"/><link rel="related" href="#plugins" title="Plugins section"/><summary type="html">&lt;i&gt;Section: Using XMPP - Psi+&lt;/i&gt;&lt;hr/&gt;Context: You need to have installed the skins plugin in the Plugins section for this to work. If you have done so, type cp -R /tmp/_SBo/psi-plus-snapshots-1.5.1642/skins /usr/share/psi-plus. This is the same exact process as with icons - just copying the skins from the Psi+ source folder to the one Psi+ actually reads them from. Enable the Skins plugin in the plugin window, and enter its settings like this:</summary><title>Installing skins</title></entry><entry><author><email>digdeeper@disroot.org</email><name>DigDeeper</name><uri>xmpp:diggy@digdeeper.love</uri></author><content xmlns="http://www.w3.org/1999/xhtml" type="xhtml"><div class="subsection"><h3 id="psi-account">Adding an account</h3><p>When you turn on Psi+, this screen will appear:</p><img class="center" src="/images/psi_initial_screen.png" width="713" height="177" alt="Psi initial screen"/><p>To use XMPP, you need to register an account first. Press the <em>Register new account</em> button as shown, and the screen will switch to this:</p><img class="center" src="/images/psi_register_screen.png" width="475" height="487" alt="Psi registration screen"/><p>I am using <em>jabber.cz</em> for our server, but you can choose any other from the list. However, there is no guarantee all the functionality will be available on every server. Click <em>Next</em> and the screen will change again:</p><img class="center" src="/images/psi_register_screen2.png" width="475" height="797" alt="Psi next registration screen"/><p>Input your desired username (this can be anything) in the relevant field, as well as a strong password (16+ characters that are not easily guessable like birth dates or your kids' names). You might be asked to solve a captcha, so type the number in the picture into the last field. Then click <em>Next</em>, and our registration is finalized:</p><img class="center" src="/images/psi_register_screen3.png" width="512" height="205" alt="Psi registration finalized"/></div></content><id>psi-account</id><link rel="enclosure" href="/images/psi_initial_screen.png" title="Psi initial screen" type="image/png"/><link rel="enclosure" href="/images/psi_register_screen.png" title="Psi registration screen" type="image/png"/><link rel="enclosure" href="/images/psi_register_screen2.png" title="Psi next registration screen" type="image/png"/><link rel="enclosure" href="/images/psi_register_screen3.png" title="Psi registration finalized" type="image/png"/><summary type="html">&lt;i&gt;Section: Using XMPP - Psi+&lt;/i&gt;&lt;hr/&gt;Context: When you turn on Psi+, this screen will appear:</summary><title>Adding an account</title></entry><entry><author><email>digdeeper@disroot.org</email><name>DigDeeper</name><uri>xmpp:diggy@digdeeper.love</uri></author><content xmlns="http://www.w3.org/1999/xhtml" type="xhtml"><div class="subsection"><h3 id="psi-profile">Filling personal information</h3><p>You can fill the <em>User Info</em>, but don't have to:</p><img class="center" src="/images/psi_userinfo.png" width="836" height="444" alt="Psi user information screen"/><p>Click <em>Publish</em> (if you did fill it), then <em>Close</em>. Your server - as well as everyone who you add to your friends list or is in the same group chat - will be able to see this information, but <strong>no real data has to be submitted at any point</strong> (you can leave all the fields empty, if you want to, as well).</p></div></content><id>psi-profile</id><link rel="enclosure" href="/images/psi_userinfo.png" title="Psi user information screen" type="image/png"/><summary type="html">&lt;i&gt;Section: Using XMPP - Psi+&lt;/i&gt;&lt;hr/&gt;Context: You can fill the User Info, but don't have to:</summary><title>Filling personal information</title></entry><entry><author><email>digdeeper@disroot.org</email><name>DigDeeper</name><uri>xmpp:diggy@digdeeper.love</uri></author><content xmlns="http://www.w3.org/1999/xhtml" type="xhtml"><div class="subsection"><h3 id="psi-go-online">Going online</h3><p>Right click your username, and change your status to <em>Online</em>:</p><img class="center" src="/images/psi_go_online.png" width="783" height="807" alt="Going online in Psi"/></div></content><id>psi-go-online</id><link rel="enclosure" href="/images/psi_go_online.png" title="Going online in Psi" type="image/png"/><summary type="html">&lt;i&gt;Section: Using XMPP - Psi+&lt;/i&gt;&lt;hr/&gt;Context: Right click your username, and change your status to Online:</summary><title>Going online</title></entry><entry><author><email>digdeeper@disroot.org</email><name>DigDeeper</name><uri>xmpp:diggy@digdeeper.love</uri></author><content xmlns="http://www.w3.org/1999/xhtml" type="xhtml"><div class="subsection"><h3 id="psi-add-contact">Adding a contact</h3><p>Click the Psi logo at the bottom left, and add a contact:</p><img class="center" src="/images/psi_add_contact.png" width="783" height="807" alt="Adding a contact in Psi"/><p>You will need the XMPP address of your friend, and whatever name you want to call them with. Here is an example filled with my details:</p><img class="center" src="/images/psi_add_contact2.png" width="881" height="490" alt="Psi finalizing contact addition"/><p>When you click <em>Add</em>, this will appear:</p><img class="center" src="/images/psi_contact_added.png" width="512" height="177" alt="Psi contact added"/><p>Your friend (me in this case) will get a friend request, which they will have to approve so that you will get added to their friends list. Though this isn't strictly necessary to message someone (you can do so while knowing only their address), it will allow you to see each others' status (online, away, etc) as well as set up encryption later.</p></div></content><id>psi-add-contact</id><link rel="enclosure" href="/images/psi_add_contact.png" title="Adding a contact in Psi" type="image/png"/><link rel="enclosure" href="/images/psi_add_contact2.png" title="Psi finalizing contact addition" type="image/png"/><link rel="enclosure" href="/images/psi_contact_added.png" title="Psi contact added" type="image/png"/><summary type="html">&lt;i&gt;Section: Using XMPP - Psi+&lt;/i&gt;&lt;hr/&gt;Context: Click the Psi logo at the bottom left, and add a contact:</summary><title>Adding a contact</title></entry><entry><author><email>digdeeper@disroot.org</email><name>DigDeeper</name><uri>xmpp:diggy@digdeeper.love</uri></author><content xmlns="http://www.w3.org/1999/xhtml" type="xhtml"><div class="subsection"><h3 id="psi-convo">Starting a conversation</h3><p>Double-click on your friend's name to bring up the talk window:</p><img class="center" src="/images/psi_message_window.png" width="973" height="675" alt="Psi message window"/><p>Type whatever you want in the bottom field, and press <em>Enter</em> to send. That's it for the basics (I told you it was easy).</p></div></content><id>psi-convo</id><link rel="enclosure" href="/images/psi_message_window.png" title="Psi message window" type="image/png"/><summary type="html">&lt;i&gt;Section: Using XMPP - Psi+&lt;/i&gt;&lt;hr/&gt;Context: Double-click on your friend's name to bring up the talk window:</summary><title>Starting a conversation</title></entry><entry><author><email>digdeeper@disroot.org</email><name>DigDeeper</name><uri>xmpp:diggy@digdeeper.love</uri></author><content xmlns="http://www.w3.org/1999/xhtml" type="xhtml"><div class="subsection"><h3 id="psi-omemo">Setting up OMEMO encryption</h3><p>OMEMO is message-level encryption, which means no one other than the intended recipient can read your message - not even the XMPP servers you or your contact are using. To activate it, go to the <em>Plugins</em> menu, enable it and go to its settings like this:</p><img class="center" src="/images/psi_omemo_enable.png" width="771" height="884" alt="Showing how to enable OMEMO in Psi and enter its settings menu"/><p>The screen will change. Go to the <em>Configuration</em> tab and enable OMEMO by default:</p><img class="center" src="/images/psi_omemo_settings.png" width="718" height="919" alt="Showing the OMEMO plugin settings menu in Psi+"/><p>This will prevent sending unencrypted messages unless you explicitly choose to - but will still allow you to do so when talking with clients that don't support OMEMO. This is the sanest default possible. In some Psi+ versions, it might also be needed to move the OMEMO fish to the message window (<em>Toolbars</em>, then click <em>OMEMO</em> and press the right arrow) so that you get a notification of whether OMEMO is active, and are able to view and approve / deny your interlocutor's fingerprints. Now <em>Apply</em> and leave the menu, and let's finally try to message someone:</p><img class="center" src="/images/psi_omemo_message_window.png" width="872" height="655" alt="Message window in Psi, showing the OMEMO encryption toggle"/><p>We see the OMEMO toggle is lit up, yet the prompt shows us that the <q>OMEMO encryption is not available</q>. Here is what happens when we send a message in that case:</p><img class="center" src="/images/psi_omemo_failed.png" width="872" height="655" alt="Showing an OMEMO message not being received"/><p>This message won't be received by your intended recipient. This is because they need to verify your fingerprint before the encrypted conversation can proceed. This is a <a href="https://xmpp.org/extensions/xep-0384.html">security feature</a> that's intended to prevent MitM attacks - <q>If a client were to opportunistically start using sessions for sending without asking the user whether to trust a device first, an attacker could publish a fake device for this user, which would then receive copies of all messages sent by/to this user.</q> Ideally, everyone should be publishing their OMEMO fingerprints on a website or elsewhere, so that they could be compared to the one your XMPP client shows (I do that <a href="/contact.xhtml">here</a>). The reason it needs to be done out of band (as in, outside of the current communication channel, which in this case is the XMPP conversation) is that presumably the possible attacker does not control the other place, as well. The point is to have something trustworthy to verify the shown fingerprint <strong>against</strong>. Imagine if you tried to compare the fingerprint to a message sent through XMPP itself. If the attacker substituted a fake device, they could just as well insert a fake message (<q>The fingerprint XX XX XX that has just appeared to you is totally real, bro</q>), and pretend the shown key is real. Of course - again - your recipient needs to have an outside channel for this to matter in the first place. Anyway, once your interlocutor verifies your fingerprint like this:</p><img class="center" src="/images/gajim_fingerprint.png" width="1633" height="428" alt="Showing Gajim's OMEMO fingerprint verification screen"/><p>If you try to type an encrypted message again, this happens (re-logging might be necessary):</p><img class="center" src="/images/psi_omemo_fingerprint.png" width="863" height="648" alt="Showing Psi's OMEMO fingerprint verification screen"/><p>Before you trust the fingerprint, verify it's the same as the one <a href="/contact.xhtml">shown on my site</a>. Of course, if your recipient does not provide their authentic fingerprint anywhere else, you cannot do that and must accept (which is less secure, but still much more than sending messages without OMEMO; you'd need to be a victim of a targeted attack right at the point of the first key exchange for it to matter) or deny it blindly. Verifying the fingerprints out of band is a good habit to have if your OPSEC requirements are high, though. Okay, now the encrypted conversation can finally proceed:</p><img class="center" src="/images/psi_omemo_successful.png" width="872" height="655" alt="Showing a successful OMEMO conversation in Psi"/><p>Now, remember the OMEMO plugin settings menu, and the <q>Automatically mark new interlocutors devices as trusted</q> option? Well, in light of the above explanations, you should understand this option as simply skipping the fingerprint verification - and realize how insecure it is. That's why we keep it unchecked. Some clients do this by default, by the way - it's called TOFU (<em>Trust On First Use</em>), and again - it's not secure, allowing undetectable MitM.</p></div></content><id>psi-omemo</id><link rel="enclosure" href="/images/psi_omemo_enable.png" title="Showing how to enable OMEMO in Psi and enter its settings menu" type="image/png"/><link rel="enclosure" href="/images/psi_omemo_settings.png" title="Showing the OMEMO plugin settings menu in Psi+" type="image/png"/><link rel="enclosure" href="/images/psi_omemo_message_window.png" title="Message window in Psi, showing the OMEMO encryption toggle" type="image/png"/><link rel="enclosure" href="/images/psi_omemo_failed.png" title="Showing an OMEMO message not being received" type="image/png"/><link rel="enclosure" href="/images/gajim_fingerprint.png" title="Showing Gajim's OMEMO fingerprint verification screen" type="image/png"/><link rel="enclosure" href="/images/psi_omemo_fingerprint.png" title="Showing Psi's OMEMO fingerprint verification screen" type="image/png"/><link rel="enclosure" href="/images/psi_omemo_successful.png" title="Showing a successful OMEMO conversation in Psi" type="image/png"/><link rel="related" href="https://xmpp.org/extensions/xep-0384.html" title="security feature"/><link rel="related" href="/contact.xhtml" title="here"/><link rel="related" href="/contact.xhtml" title="shown on my site"/><summary type="html">&lt;i&gt;Section: Using XMPP - Psi+&lt;/i&gt;&lt;hr/&gt;Context: OMEMO is message-level encryption, which means no one other than the intended recipient can read your message - not even the XMPP servers you or your contact are using. To activate it, go to the Plugins menu, enable it and go to its settings like this:</summary><title>Setting up OMEMO encryption</title></entry><entry><author><email>digdeeper@disroot.org</email><name>DigDeeper</name><uri>xmpp:diggy@digdeeper.love</uri></author><content xmlns="http://www.w3.org/1999/xhtml" type="xhtml"><div class="subsection"><h3 id="psi-privacy">Privacy mitigations</h3><p>Psi+, by default, reveals your timezone, client (version and creation date), and system information (OS / Linux distro version + kernel version). The way to mitigate it is by using the plugin <em>Client Switcher</em>. Choose <q>not implemented</q> as the <q>Response mode</q>. Then mark <q>Deny iq time request</q> (this disables the timezone leak). Finally, you need to <q>Enable for</q><q>Contacts</q> and <q>Groupchats</q> (self-explanatory). This will show <em>Unknown</em> for all categories when inspected. You can also falsify your client and system info - <strong>only Psi+ can do that</strong> (not shown in this example though).</p><img src="/images/psi_client_switcher.png" width="806" height="1011" alt="Showing Psi+ Client Switcher plugin settings that allow you to hide"/><img src="/images/psi_results.png" width="750" height="606" alt="How it looks like when someone checks up on you"/><p>Every client still reveals a <em>Resource</em> header to group chat admins and all roster contacts, and in Psi+ that contains your hostname (what you see when you type <q>hostname</q> in the terminal) by default, which can be sensitive. To disable that, go to the accounts screen, and click <q>Modify</q>:</p><img class="center" src="/images/psi_accounts.png" width="617" height="884" alt="Showing the accounts screen"/><p>You can change it to whatever, but remember that Gajim and Psi+ are the only clients that are able to modify the resource header and not leak anything else, so your contacts will know you're using one of those two, either way. You can also pretend to be Dino by setting your Resource header in the format of <q>dino.</q>+8 numbers and letters. E.g <q>dino.cfg231e9</q>. Save after, and re-login.</p><img class="center" src="/images/psi_resource.png" width="820" height="105" alt="Changing Psi+ resource header"/><p>Results in this when inspected by a contact or group chat member:</p><img class="center" src="/images/psi_pineapple.png" width="656" height="257" alt="Showing what the modified resource header looks like when viewed by someone else"/></div></content><id>psi-privacy</id><link rel="enclosure" href="/images/psi_client_switcher.png" title="Showing Psi+ Client Switcher plugin settings that allow you to hide" type="image/png"/><link rel="enclosure" href="/images/psi_results.png" title="How it looks like when someone checks up on you" type="image/png"/><link rel="enclosure" href="/images/psi_accounts.png" title="Showing the accounts screen" type="image/png"/><link rel="enclosure" href="/images/psi_resource.png" title="Changing Psi+ resource header" type="image/png"/><link rel="enclosure" href="/images/psi_pineapple.png" title="Showing what the modified resource header looks like when viewed by someone else" type="image/png"/><summary type="html">&lt;i&gt;Section: Using XMPP - Psi+&lt;/i&gt;&lt;hr/&gt;Context: Psi+, by default, reveals your timezone, client (version and creation date), and system information (OS / Linux distro version + kernel version). The way to mitigate it is by using the plugin Client Switcher. Choose not implemented as the Response mode. Then mark Deny iq time request (this disables the timezone leak). Finally, you need to Enable forContacts and Groupchats (self-explanatory). This will show Unknown for all categories when inspected. You can also falsify your client and system info - only Psi+ can do that (not shown in this example though).</summary><title>Privacy mitigations</title></entry><entry><author><email>digdeeper@disroot.org</email><name>DigDeeper</name><uri>xmpp:diggy@digdeeper.love</uri></author><content xmlns="http://www.w3.org/1999/xhtml" type="xhtml"><div class="subsection"><h3 id="gajim-intro">Introduction</h3><p><strong>UPDATE April 2023</strong>: I guess it is fitting to post a guide for the client I actually daily drive. Version 0.16.9 includes all relevant features (but no bloat unlike Psi+), a good UI (it is the only usable client still compatible with gtk2) and OTR support (nuJim <a href="https://dev.gajim.org/gajim/gajim-plugins/-/wikis/OffTheRecordPlugin">dropped that</a> and won't bring it back - <q>The plugin won't work with Gajim &gt;= 1.0 as it was not ported to python3. There is no port planned.</q>). The reason OTR support is important is because there are clients out there (e.g mcabber) that do not support OMEMO but do OTR, and the lack of it would prevent encrypted communication with them. There are no known <a href="https://www.cvedetails.com/vulnerability-list/vendor_id-11939/Gajim.html"> security issues</a> with this version, either. Newer versions have increasingly become more Discord-like with nothing else to justify them; you can read the complaints on the internet - but in this guide, we'd rather be focusing on something good which is Gajim 0.16.9.</p></div></content><id>gajim-intro</id><link rel="related" href="https://dev.gajim.org/gajim/gajim-plugins/-/wikis/OffTheRecordPlugin" title="dropped that"/><link rel="related" href="https://www.cvedetails.com/vulnerability-list/vendor_id-11939/Gajim.html" title=" security issues"/><summary type="html">&lt;i&gt;Section: Using XMPP - Gajim 0.16.9&lt;/i&gt;&lt;hr/&gt;Context: UPDATE April 2023: I guess it is fitting to post a guide for the client I actually daily drive. Version 0.16.9 includes all relevant features (but no bloat unlike Psi+), a good UI (it is the only usable client still compatible with gtk2) and OTR support (nuJim dropped that and won't bring it back - The plugin won't work with Gajim &gt;= 1.0 as it was not ported to python3. There is no port planned.). The reason OTR support is important is because there are clients out there (e.g mcabber) that do not support OMEMO but do OTR, and the lack of it would prevent encrypted communication with them. There are no known  security issues with this version, either. Newer versions have increasingly become more Discord-like with nothing else to justify them; you can read the complaints on the internet - but in this guide, we'd rather be focusing on something good which is Gajim 0.16.9.</summary><title>Introduction</title></entry><entry><author><email>digdeeper@disroot.org</email><name>DigDeeper</name><uri>xmpp:diggy@digdeeper.love</uri></author><content xmlns="http://www.w3.org/1999/xhtml" type="xhtml"><div class="subsection"><h3 id="gajim-install">Installation</h3><p>To install Gajim 0.16.9 in Slackware 14-based distros, you need these packages:</p><ul><li><span class="list">asn1crypto-0.24.0</span></li><li><span class="list">at-spi2-atk-2.18.1</span></li><li><span class="list">gajim-0.16.9</span></li><li><span class="list">gnome-python-2.28.1</span></li><li><span class="list">idna-2.6</span></li><li><span class="list">ipaddress-1.0.16</span></li><li><span class="list">libunistring-0.9.10</span></li><li><span class="list">notify-python-0.1.1</span></li><li><span class="list">protobuf-2.6.1</span></li><li><span class="list">pyOpenSSL-0.15.1</span></li><li><span class="list">pyasn1-0.1.9</span></li><li><span class="list">pyasn1-modules-0.0.8</span></li><li><span class="list">pycrypto-2.6.1</span></li><li><span class="list">pycurl-7.43.0</span></li><li><span class="list">pygobject-2.28.6</span></li><li><span class="list">pygtk-2.24.0</span></li><li><span class="list">python-axolotl-0.1.39</span></li><li><span class="list">python-axolotl-curve25519-0.1</span></li><li><span class="list">python-cffi-1.5.2</span></li><li><span class="list">python-cryptography-1.3.1</span></li><li><span class="list">python-enum34-1.1.2</span></li><li><span class="list">python-nbxmpp-0.6.2</span></li><li><span class="list">python-six-1.11.0</span></li><li><span class="list">service_identity-14.0.0</span></li></ul><p>Versions need to match at least for some of them. Newer e.g pyOpenSSL will be undetected, while other mismatches might make Gajim fail with different random errors. I've spent hours (and a handful of pulled hair) hunting down this exact set of dependencies, and I know it works; if you want to try another, you're on your own (have fun digging through the useless or even misleading errors Gajim will spit). <strong>This applies only to Slackware 14.2</strong>; you can still run this program on 15, but the requirements are a little different - <em>cffi</em> changes to <em>1.13.2</em>; <em>enum34</em> to <em>1.1.10</em> or higher; <em>idna</em> to <em>2.9</em> or higher; <em>pyasn1</em> to <em>0.4.4</em>; <em>pyasn1-modules</em> to <em>0.2.2</em>; <em>cryptography</em> to <em>3.3.2</em>; <em>pygobject</em> to <em>2.28.7</em>; <em>pyOpenSSL</em> to <em>21.0.0</em> or higher; and <em>six</em> to <em>1.14.0</em> or higher. <strong>UPDATE October 2025</strong>: The needed axolotl versions seem to be missing from repos completely now; I think the support for 0.16.9 is dying. All the deps take about 10mb compressed; while for Psi+, qt5 alone (plus the stuff it pulls) is over 100mb compressed and over 600mb uncompressed. Gajim 0.16.9 is contained in e.g the Ponce's repository, or you can use slapt-src (remember the no-dep option or it will pull some BS deps). This client can also be installed on 32-bit versions of Slackware. Anyway - assuming the installation went successfully - let's dive right in and register an account (you can do it inside the client itself):</p></div></content><id>gajim-install</id><summary type="html">&lt;i&gt;Section: Using XMPP - Gajim 0.16.9&lt;/i&gt;&lt;hr/&gt;Context: To install Gajim 0.16.9 in Slackware 14-based distros, you need these packages:</summary><title>Installation</title></entry><entry><author><email>digdeeper@disroot.org</email><name>DigDeeper</name><uri>xmpp:diggy@digdeeper.love</uri></author><content xmlns="http://www.w3.org/1999/xhtml" type="xhtml"><div class="subsection"><h3 id="gajim-add-account">Adding an account</h3><img class="center" src="/images/gajim_accounts.png" width="596" height="230" alt="Gajim accounts screen"/><p>Enter the menu shown, and the screen will switch to this:</p><img class="center" src="/images/gajim_add.png" width="190" height="469" alt="Adding an account in Gajim"/><p>Click <em>Add</em> here.</p><img class="center" src="/images/gajim_add_forward.png" width="672" height="299" alt="Choosing to register a new account in Gajim"/><p>Pick the relevant option and click <em>Forward</em>.</p><img class="center" src="/images/gajim_select_server.png" width="826" height="437" alt="Picking a server in Gajim registration screen"/><p>In this screen we choose the server our account will be on. We will use <em>jabber.sk</em> for this guide, but you can pick any other. Keep in mind they all have different properties; some might block TOR, in-band (client) registration or lack certain features. Anyway, jabber.sk does allow us to sign-up through the client while using TOR; if you want to do that, just expand <em>Advanced</em> and set it as the proxy (this is an in-built option in Gajim). Remember you need to have <a href="./darknetslack.xhtml#intro">TOR running</a> on your machine in the first place for it to work. You can leave the proxy empty but will be revealing your IP to the server, then (unless using a <a href="./vpn.xhtml">system-wide VPN</a>). Click <em>Forward</em> as usual.</p><img class="center" src="/images/gajim_register.png" width="826" height="437" alt="Gajim data input and captcha screen"/><p>Insert the username and password that you want to have (the latter you can change later). Then, type in the number you see in the displayed image into the captcha (last) field; not all servers require this. If the registration was successful (e.g you didn't take too long to fill the captcha), the screen will change to this:</p><img class="center" src="/images/gajim_finish.png" width="826" height="437" alt="Finished registering an account in Gajim"/></div></content><id>gajim-add-account</id><link rel="enclosure" href="/images/gajim_accounts.png" title="Gajim accounts screen" type="image/png"/><link rel="enclosure" href="/images/gajim_add.png" title="Adding an account in Gajim" type="image/png"/><link rel="enclosure" href="/images/gajim_add_forward.png" title="Choosing to register a new account in Gajim" type="image/png"/><link rel="enclosure" href="/images/gajim_select_server.png" title="Picking a server in Gajim registration screen" type="image/png"/><link rel="enclosure" href="/images/gajim_register.png" title="Gajim data input and captcha screen" type="image/png"/><link rel="enclosure" href="/images/gajim_finish.png" title="Finished registering an account in Gajim" type="image/png"/><link rel="related" href="./darknetslack.xhtml#intro" title="TOR running"/><link rel="related" href="./vpn.xhtml" title="system-wide VPN"/><summary type="html">&lt;i&gt;Section: Using XMPP - Gajim 0.16.9&lt;/i&gt;&lt;hr/&gt;Context: Enter the menu shown, and the screen will switch to this:</summary><title>Adding an account</title></entry><entry><author><email>digdeeper@disroot.org</email><name>DigDeeper</name><uri>xmpp:diggy@digdeeper.love</uri></author><content xmlns="http://www.w3.org/1999/xhtml" type="xhtml"><div class="subsection"><h3 id="gajim-privacy">Privacy mitigations</h3><p>We're going to do some privacy mitigations for Gajim now. I will assume here you are using <a href="./darknetslack.xhtml">a TOR-only setup</a> and want everything to go through it. Enter the <em>Preferences</em> menu:</p><img class="center" src="/images/gajim_prefs.png" width="596" height="229" alt="Entering the Preferences menu in Gajim"/><p>Now switch to the <em>Advanced</em> tab and set everything like this:</p><img class="center" src="/images/gajim_mitigation.png" width="928" height="899" alt="Privacy mitigations in Gajim"/><p>We're setting custom applications so that whenever someone posts a website or E-mail link in a chat - and you click it - Gajim will open it through TOR instead of in the clear which would reveal your IP address. This requires <a href="./darknetslack.xhtml#proxychains">proxychains</a> to be installed and setup in the first place. Of course, if you're using something other than Claws Mail and Pale Moon, input those instead (but keep the <q>proxychains4</q> part).</p><p>We're setting TOR as the global proxy, for obvious reasons. This means every account - even ones made after this - will use it. Disabling <q>Allow client / OS information to be sent</q> as well as <q>Allow local system time information to be sent</q> prevents Gajim from leaking data which it does by default. An important to note fact is that <strong>Gajim retardedly regenerates the leaks upon the creation of every new account</strong>, so you will have to disable them again every time you create one. Don't close the <em>Preferences</em> menu yet and instead open the <em>Advanced Configuration Editor</em>.</p><img class="center" src="/images/gajim_searx.png" width="1380" height="361" alt="Setting SearX as the search engine in Gajim"/><p>By default - when you right click on a selection and choose the <em>Web Search for It</em> option - Gajim will send your query to Google (ugh). Find the <em>search_engine</em> preference, click the <em>Value</em> part and change it to your favorite SearX instance, or even something like Qwant Lite with <q>https://lite.qwant.com/?q=%s</q>. Press Enter and finally <em>Close</em>.</p></div></content><id>gajim-privacy</id><link rel="enclosure" href="/images/gajim_prefs.png" title="Entering the Preferences menu in Gajim" type="image/png"/><link rel="enclosure" href="/images/gajim_mitigation.png" title="Privacy mitigations in Gajim" type="image/png"/><link rel="enclosure" href="/images/gajim_searx.png" title="Setting SearX as the search engine in Gajim" type="image/png"/><link rel="related" href="./darknetslack.xhtml" title="a TOR-only setup"/><link rel="related" href="./darknetslack.xhtml#proxychains" title="proxychains"/><summary type="html">&lt;i&gt;Section: Using XMPP - Gajim 0.16.9&lt;/i&gt;&lt;hr/&gt;Context: We're going to do some privacy mitigations for Gajim now. I will assume here you are using a TOR-only setup and want everything to go through it. Enter the Preferences menu:</summary><title>Privacy mitigations</title></entry><entry><author><email>digdeeper@disroot.org</email><name>DigDeeper</name><uri>xmpp:diggy@digdeeper.love</uri></author><content xmlns="http://www.w3.org/1999/xhtml" type="xhtml"><div class="subsection"><h3 id="gajim-go-online">Going online</h3><img class="center" src="/images/gajim_go_online.png" width="821" height="440" alt="Going online in Gajim"/><p>We can go online now. Right click your account name and change your status to <em>Available</em>. Then the screen will change to this:</p><img class="center" src="/images/gajim_enterpass.png" width="553" height="263" alt="Password entry screen in Gajim"/><p>Enter the password you've set before and click <em>OK</em>. If you want to login automatically on launch, you can mark the <em>Save password</em> option. I don't like it because it exposes you to local attack, e.g by a girlfriend. Anyway, we're going to set up our profile now (this step is <strong>completely optional</strong>):</p></div></content><id>gajim-go-online</id><link rel="enclosure" href="/images/gajim_go_online.png" title="Going online in Gajim" type="image/png"/><link rel="enclosure" href="/images/gajim_enterpass.png" title="Password entry screen in Gajim" type="image/png"/><summary type="html">&lt;i&gt;Section: Using XMPP - Gajim 0.16.9&lt;/i&gt;&lt;hr/&gt;Context: We can go online now. Right click your account name and change your status to Available. Then the screen will change to this:</summary><title>Going online</title></entry><entry><author><email>digdeeper@disroot.org</email><name>DigDeeper</name><uri>xmpp:diggy@digdeeper.love</uri></author><content xmlns="http://www.w3.org/1999/xhtml" type="xhtml"><div class="subsection"><h3 id="gajim-profile">Filling personal information</h3><p>Enter the <em>Accounts</em> menu again, but this time switch to the <em>Personal Information</em> tab:</p><img class="center" src="/images/gajim_personal1.png" width="1025" height="563" alt="Personal Information tab of the Accounts menu in Gajim"/><p>Click <em>Edit Personal Information</em> and the screen will change to this:</p><img class="center" src="/images/gajim_personal2.png" width="834" height="622" alt="Filling in your personal information in Gajim"/><p>Everyone you add to your friend list or enter a group chat with will be able to see this information, so be careful of what you put there; you can also leave it empty. Some of this data is also automatically inserted into your subscription message for whenever you add someone to your roster. To be perfectly clear, <strong>you do not have to fill in any of this</strong>. But if you did, click <em>OK</em> to publish the information and let's finally add a contact:</p></div></content><id>gajim-profile</id><link rel="enclosure" href="/images/gajim_personal1.png" title="Personal Information tab of the Accounts menu in Gajim" type="image/png"/><link rel="enclosure" href="/images/gajim_personal2.png" title="Filling in your personal information in Gajim" type="image/png"/><summary type="html">&lt;i&gt;Section: Using XMPP - Gajim 0.16.9&lt;/i&gt;&lt;hr/&gt;Context: Enter the Accounts menu again, but this time switch to the Personal Information tab:</summary><title>Filling personal information</title></entry><entry><author><email>digdeeper@disroot.org</email><name>DigDeeper</name><uri>xmpp:diggy@digdeeper.love</uri></author><content xmlns="http://www.w3.org/1999/xhtml" type="xhtml"><div class="subsection"><h3 id="gajim-add-contact">Adding a contact</h3><img class="center" src="/images/gajim_add_contact.png" width="728" height="427" alt="Entering the add contact menu in Gajim"/><p>Enter this menu and the screen will change to this:</p><img class="center" src="/images/gajim_add_contact2.png" width="888" height="514" alt="Entering the data for your added contact"/><p><em>Jabber ID</em> is the XMPP address of your friend. Nickname can be anything you want, but better leave it as something that will remind you of the person you're adding. The subscription message at the bottom is what your contact will see when they login and receive the friend request (it's the default, and fills in the info you've put in the <em>Personal Preferences</em> menu, as you can see). We will leave the <em>Group</em> empty since it's not necessary. When you send the friend request, this is what your recipient will see:</p><img class="center" src="/images/gajim_subrequest.png" width="878" height="242" alt="How the subscription request looks like from your friend's side"/><p>If they accept, you will see this:</p><img class="center" src="/images/gajim_accepted.png" width="520" height="254" alt="What appears when your friend accepts your request"/></div></content><id>gajim-add-contact</id><link rel="enclosure" href="/images/gajim_add_contact.png" title="Entering the add contact menu in Gajim" type="image/png"/><link rel="enclosure" href="/images/gajim_add_contact2.png" title="Entering the data for your added contact" type="image/png"/><link rel="enclosure" href="/images/gajim_subrequest.png" title="How the subscription request looks like from your friend's side" type="image/png"/><link rel="enclosure" href="/images/gajim_accepted.png" title="What appears when your friend accepts your request" type="image/png"/><summary type="html">&lt;i&gt;Section: Using XMPP - Gajim 0.16.9&lt;/i&gt;&lt;hr/&gt;Context: Enter this menu and the screen will change to this:</summary><title>Adding a contact</title></entry><entry><author><email>digdeeper@disroot.org</email><name>DigDeeper</name><uri>xmpp:diggy@digdeeper.love</uri></author><content xmlns="http://www.w3.org/1999/xhtml" type="xhtml"><div class="subsection"><h3 id="gajim-start-convo">Starting a conversation</h3><p>Double-click your friend's nickname in the roster window...</p><img class="center" src="/images/gajim_enter_talk_window.png" width="542" height="257" alt="Entering the talk window in Gajim"/><p>and the talk window will appear:</p><img class="center" src="/images/gajim_send_message.png" width="492" height="403" alt="The actual talk window in Gajim"/><p>You can type messages in the bottom field, and send them by clicking <em>Send</em> or just pressing Enter.</p><img class="center" src="/images/gajim_receive_message.png" width="583" height="489" alt="Receiving message in Gajim"/><p>The above is what your recipient will see.</p></div></content><id>gajim-start-convo</id><link rel="enclosure" href="/images/gajim_enter_talk_window.png" title="Entering the talk window in Gajim" type="image/png"/><link rel="enclosure" href="/images/gajim_send_message.png" title="The actual talk window in Gajim" type="image/png"/><link rel="enclosure" href="/images/gajim_receive_message.png" title="Receiving message in Gajim" type="image/png"/><summary type="html">&lt;i&gt;Section: Using XMPP - Gajim 0.16.9&lt;/i&gt;&lt;hr/&gt;Context: Double-click your friend's nickname in the roster window...</summary><title>Starting a conversation</title></entry><entry><author><email>digdeeper@disroot.org</email><name>DigDeeper</name><uri>xmpp:diggy@digdeeper.love</uri></author><content xmlns="http://www.w3.org/1999/xhtml" type="xhtml"><div class="subsection"><h3 id="gajim-omemo">Setting up OMEMO encryption</h3><p>Go to <em>Edit</em> -&gt; <em>Plugins</em> -&gt; <em>Available</em> and set the checkmark near <em>OMEMO</em>, then click <em>Install / Upgrade</em> on the right. You will get a security warning because Gajim won't be able to verify the cert; if you're worried you can download the zip from <a href="https://ftp.gajim.org/plugins_0.16_zip/">their site</a> with your browser, which I have also <a href="/others/gajim-omemo-plugin.zip">mirrored locally</a> just in case they deprecate the older version's plugins. After that, the procedure is similar to the Psi+ one. Just message someone with OMEMO enabled and a list of fingerprints will appear, then accept (first confirm out of band if possible). By the way, you need to add someone to your roster for Gajim to receive the "device list" and display the fingerprints. But, you can revoke the subscription later and keep using OMEMO with someone who is no longer in your roster. However, if that person gets a new fingerprint, you won't be able to receive it and will have to re-add them. This is the case in even the newest Gajim versions it seems. <strong>UPDATE February 2026</strong>: and - if someone gets a new fingerprint, and you send an OMEMO-encrypted message before accepting it - it won't reach the target. This probably works different in TOFU clients, but the way Oldjim does it, is more secure. Just telling you this so that you are not surprised if - at some point - you sent a message to someone but they act like they didn't receive it.</p></div></content><id>gajim-omemo</id><link rel="related" href="https://ftp.gajim.org/plugins_0.16_zip/" title="their site"/><link rel="related" href="/others/gajim-omemo-plugin.zip" title="mirrored locally"/><summary type="html">&lt;i&gt;Section: Using XMPP - Gajim 0.16.9&lt;/i&gt;&lt;hr/&gt;Context: Go to Edit -&gt; Plugins -&gt; Available and set the checkmark near OMEMO, then click Install / Upgrade on the right. You will get a security warning because Gajim won't be able to verify the cert; if you're worried you can download the zip from their site with your browser, which I have also mirrored locally just in case they deprecate the older version's plugins. After that, the procedure is similar to the Psi+ one. Just message someone with OMEMO enabled and a list of fingerprints will appear, then accept (first confirm out of band if possible). By the way, you need to add someone to your roster for Gajim to receive the "device list" and display the fingerprints. But, you can revoke the subscription later and keep using OMEMO with someone who is no longer in your roster. However, if that person gets a new fingerprint, you won't be able to receive it and will have to re-add them. This is the case in even the newest Gajim versions it seems. UPDATE February 2026: and - if someone gets a new fingerprint, and you send an OMEMO-encrypted message before accepting it - it won't reach the target. This probably works different in TOFU clients, but the way Oldjim does it, is more secure. Just telling you this so that you are not surprised if - at some point - you sent a message to someone but they act like they didn't receive it.</summary><title>Setting up OMEMO encryption</title></entry><entry><author><email>digdeeper@disroot.org</email><name>DigDeeper</name><uri>xmpp:diggy@digdeeper.love</uri></author><content xmlns="http://www.w3.org/1999/xhtml" type="xhtml"><div class="subsection"><h3 id="pidgin">Pidgin</h3><p>Doubles as a client for IRC and some other protocols. I really like the UI, which relies on GTK2. Leaks your client and version (for example, <em>Pidgin 2.11.0 (libpurple 2.11.0)</em>) and timezone, but <strong>not system info</strong> unlike Psi+ (it shows up as <em>Unknown</em>); these leaks also cannot be disabled. Supports OTR and OMEMO, but the <a href="https://github.com/gkdr/lurch">OMEMO plugin</a> is terminal-based and sucks (cannot accept or remove fingerprints). Decent program in terms of design, but due to the data leaks and bad OMEMO support, cannot be recommended. However, if you really want to use Pidgin, <strong>you can nullify the timezone leak by changing the system's timezone</strong>; this does not fully prevent it, just displays a fake value. This way will also affect other things in your system, like the clock. <strong>Edit</strong>: on Windows, <a href="https://www.nirsoft.net/utils/run_as_date.html">RunAsDate</a> can be used to spoof the timezone. <strong>Pidgin cannot connect to onion domains</strong>, failing with the <q>SSL handshake failed</q> error - regardless of any settings. Yet another significant flaw, which means Gajim is superior unless you need the other prococols. Pidgin does not support message editing either, showing the modified messages as new ones:</p><img class="center" src="/images/pidgin1.png" width="1279" height="774" alt="Pidgin  window screenshot"/></div></content><id>pidgin</id><link rel="enclosure" href="/images/pidgin1.png" title="Pidgin  window screenshot" type="image/png"/><link rel="related" href="https://github.com/gkdr/lurch" title="OMEMO plugin"/><link rel="related" href="https://www.nirsoft.net/utils/run_as_date.html" title="RunAsDate"/><summary type="html">&lt;i&gt;Section: Other clients&lt;/i&gt;&lt;hr/&gt;Context: Doubles as a client for IRC and some other protocols. I really like the UI, which relies on GTK2. Leaks your client and version (for example, Pidgin 2.11.0 (libpurple 2.11.0)) and timezone, but not system info unlike Psi+ (it shows up as Unknown); these leaks also cannot be disabled. Supports OTR and OMEMO, but the OMEMO plugin is terminal-based and sucks (cannot accept or remove fingerprints). Decent program in terms of design, but due to the data leaks and bad OMEMO support, cannot be recommended. However, if you really want to use Pidgin, you can nullify the timezone leak by changing the system's timezone; this does not fully prevent it, just displays a fake value. This way will also affect other things in your system, like the clock. Edit: on Windows, RunAsDate can be used to spoof the timezone. Pidgin cannot connect to onion domains, failing with the SSL handshake failed error - regardless of any settings. Yet another significant flaw, which means Gajim is superior unless you need the other prococols. Pidgin does not support message editing either, showing the modified messages as new ones:</summary><title>Pidgin</title></entry><entry><author><email>digdeeper@disroot.org</email><name>DigDeeper</name><uri>xmpp:diggy@digdeeper.love</uri></author><content xmlns="http://www.w3.org/1999/xhtml" type="xhtml"><div class="subsection"><h3 id="conversations">Conversations</h3><p>Leaks client and version (for example, <em>Conversations 2.10.2+fcr</em>) plus timezone and the fact that it's on Android (but no specific system info). This applies to all the Conversations family (blabber etc). <strong>Using them through TOR prevents the timezone leak</strong>, but still leaks everything else. All Android XMPP clients auto-invite you to group chats, leading to easy trolling. There is no way to mitigate any phone client in full unless you use <a href="./phones.xhtml">Diggy's black magic</a>. Usability wise, compared to ChatSecure, <q>It's a little clunky... Scrolling and menu changes jump around and switching between group and one on one chats is horrendous. I also have to go through two sub sections to change OMEMO settings to blindly accept or save or reject. With ChatSecure I could look at OMEMO keys in each chat. Conversations requires me to go out of chat to main settings and then a sub configuration menus. Just tedious. I don't get any indication on your status. ChatSecure had a green ring around each avatar when someone was online and how many hours ago.</q> For something more positive, <q>ChatSecure never told me when someone left but Conversations actually did with a visual change too</q>.</p><img class="vidya" src="/images/conversations_settings.jpg" alt="Conversations settings menu"/><img class="vidya" src="/images/conversations_add_account.jpg" alt="Conversations add account screen"/><img class="vidya" src="/images/conversations_convos.jpg" alt="Conversations currently going convos"/><img class="vidya" src="/images/conversations_roster.jpg" alt="Conversations roster"/><img class="vidya" src="/images/conversations_accounts.jpg" alt="Conversations accounts screen"/></div></content><id>conversations</id><link rel="enclosure" href="/images/conversations_settings.jpg" title="Conversations settings menu" type="image/jpg"/><link rel="enclosure" href="/images/conversations_add_account.jpg" title="Conversations add account screen" type="image/jpg"/><link rel="enclosure" href="/images/conversations_convos.jpg" title="Conversations currently going convos" type="image/jpg"/><link rel="enclosure" href="/images/conversations_roster.jpg" title="Conversations roster" type="image/jpg"/><link rel="enclosure" href="/images/conversations_accounts.jpg" title="Conversations accounts screen" type="image/jpg"/><link rel="related" href="./phones.xhtml" title="Diggy's black magic"/><summary type="html">&lt;i&gt;Section: Other clients&lt;/i&gt;&lt;hr/&gt;Context: Leaks client and version (for example, Conversations 2.10.2+fcr) plus timezone and the fact that it's on Android (but no specific system info). This applies to all the Conversations family (blabber etc). Using them through TOR prevents the timezone leak, but still leaks everything else. All Android XMPP clients auto-invite you to group chats, leading to easy trolling. There is no way to mitigate any phone client in full unless you use Diggy's black magic. Usability wise, compared to ChatSecure, It's a little clunky... Scrolling and menu changes jump around and switching between group and one on one chats is horrendous. I also have to go through two sub sections to change OMEMO settings to blindly accept or save or reject. With ChatSecure I could look at OMEMO keys in each chat. Conversations requires me to go out of chat to main settings and then a sub configuration menus. Just tedious. I don't get any indication on your status. ChatSecure had a green ring around each avatar when someone was online and how many hours ago. For something more positive, ChatSecure never told me when someone left but Conversations actually did with a visual change too.</summary><title>Conversations</title></entry><entry><author><email>digdeeper@disroot.org</email><name>DigDeeper</name><uri>xmpp:diggy@digdeeper.love</uri></author><content xmlns="http://www.w3.org/1999/xhtml" type="xhtml"><div class="subsection"><h3 id="dino">Dino</h3><p>Does not leak timezone, client version, or system information. Does leak its name in the resource header - this means that all clients expose it, instead of just Psi and Gajim. <strong>UPDATE May 2022</strong>: new version has multiple account support and MUC invitations, so it's not as useless now. It is still pretty barren if you look at the screenshots - almost like a phone client brought to desktops. <strong>Cannot connect to onions</strong>. GTK3 dependence. No OTR; does support OMEMO well though.</p><img class="vidya" src="/images/dino_join_channel.png" alt="Dino join channel screen"/><img class="vidya" src="/images/dino_message_window.png" alt="Dino message window"/><img class="vidya" src="/images/dino_account_screen.png" alt="Dino account screen"/><img class="vidya" src="/images/dino_menu.png" alt="Dino menu"/><img class="vidya" src="/images/dino_MUC.png" alt="Dino actions from right click on a MUC member"/></div></content><id>dino</id><link rel="enclosure" href="/images/dino_join_channel.png" title="Dino join channel screen" type="image/png"/><link rel="enclosure" href="/images/dino_message_window.png" title="Dino message window" type="image/png"/><link rel="enclosure" href="/images/dino_account_screen.png" title="Dino account screen" type="image/png"/><link rel="enclosure" href="/images/dino_menu.png" title="Dino menu" type="image/png"/><link rel="enclosure" href="/images/dino_MUC.png" title="Dino actions from right click on a MUC member" type="image/png"/><summary type="html">&lt;i&gt;Section: Other clients&lt;/i&gt;&lt;hr/&gt;Context: Does not leak timezone, client version, or system information. Does leak its name in the resource header - this means that all clients expose it, instead of just Psi and Gajim. UPDATE May 2022: new version has multiple account support and MUC invitations, so it's not as useless now. It is still pretty barren if you look at the screenshots - almost like a phone client brought to desktops. Cannot connect to onions. GTK3 dependence. No OTR; does support OMEMO well though.</summary><title>Dino</title></entry><entry><author><email>digdeeper@disroot.org</email><name>DigDeeper</name><uri>xmpp:diggy@digdeeper.love</uri></author><content xmlns="http://www.w3.org/1999/xhtml" type="xhtml"><div class="subsection"><h3 id="profanity">Profanity</h3><p>Terminal-based. Can disable leaked system info and timezone, <strong>but not the client and version</strong>. <strong>UPDATE October 2023</strong>: someone mentioned that it is possible to do so now. <strong>UPDATE</strong>: people have told me <strong>OMEMO does not work properly in it</strong> when talking with other clients such as Dino. <strong>UPDATE 2</strong>: I got told that it is hard to recognize you have been mentioned (quoted) when you have been away for a few hours. <strong>UPDATE November 2022</strong>: SomeH4x0r just reported more issues, I will just quote him straight up. <q>It doesn't display why it fails to connect and I just have to repeat /connect until it works. Also, I talked with a person with a long address, and it turned out it strips parts of their messages (the sender address can also be stripped). I tried to talk to another person with *the same* client (Profanity). OMEMO failed to see the keys on both sides.</q></p></div></content><id>profanity</id><summary type="html">&lt;i&gt;Section: Other clients&lt;/i&gt;&lt;hr/&gt;Context: Terminal-based. Can disable leaked system info and timezone, but not the client and version. UPDATE October 2023: someone mentioned that it is possible to do so now. UPDATE: people have told me OMEMO does not work properly in it when talking with other clients such as Dino. UPDATE 2: I got told that it is hard to recognize you have been mentioned (quoted) when you have been away for a few hours. UPDATE November 2022: SomeH4x0r just reported more issues, I will just quote him straight up. It doesn't display why it fails to connect and I just have to repeat /connect until it works. Also, I talked with a person with a long address, and it turned out it strips parts of their messages (the sender address can also be stripped). I tried to talk to another person with *the same* client (Profanity). OMEMO failed to see the keys on both sides.</summary><title>Profanity</title></entry><entry><author><email>digdeeper@disroot.org</email><name>DigDeeper</name><uri>xmpp:diggy@digdeeper.love</uri></author><content xmlns="http://www.w3.org/1999/xhtml" type="xhtml"><div class="subsection"><h3 id="chatsecure">ChatSecure</h3><p>An open source and fully available on GitHub for the IOS App. Unfortunately it's designed specifically and only for IOS mobile devices which are inherently insecure due to the need for Apple's store, and their proprietary data collection methods that cannot be mitigated. In addition to a myriad of privacy risk with using wifi and cellular data plans, Apple's proprietary exclusivity to everything really. Compared to the Android clients, <strong>ChatSecure does not reveal its version, timezone, or system information</strong> - only the client name in the resource header; this makes it one of the best in terms of data leaks. Notable features that give it some grace:</p><p>ChatSecure <strong>supports OTR</strong>. Not auto-joining group chats or auto accepting OMEMO keys. Has the ability to OMEMO group chats on a per chat basis. ChatSecure also lets users reject or save new OMEMO keys. If you and a friend have not chatted for a while a default message appears and encourages you to verify who you are messaging. Users can also enable auto chat delete when disconnecting and manage downloaded media. Also configuration options for pinned certificates to manage saved SSL Certs. It grants users to add multiple accounts and edit their server information too. It appears to work cross client well too with users using older versions and current production versions. Ironically it lacks the basic copy and paste ability (big frustration with other languages). It is easy for anyone but lacks many features that are necessary for the goal of XMPP/OMEMO, such as MUC whispers. Oh, and you can't disable typing notifications, so your interlocutor will always know the exact moments you are typing, or stopping, and then resuming...</p><p>Written by an anonymous author, who also provided these screenshots:</p><img class="vidya" src="/images/chatsecure1.jpg" alt="ChatSecure screenshot"/><img class="vidya" src="/images/chatsecure2.jpg" alt="ChatSecure screenshot"/><img class="vidya" src="/images/chatsecure3.jpg" alt="ChatSecure screenshot"/><img class="vidya" src="/images/chatsecure4.jpg" alt="ChatSecure screenshot"/></div></content><id>chatsecure</id><link rel="enclosure" href="/images/chatsecure1.jpg" title="ChatSecure screenshot" type="image/jpg"/><link rel="enclosure" href="/images/chatsecure2.jpg" title="ChatSecure screenshot" type="image/jpg"/><link rel="enclosure" href="/images/chatsecure3.jpg" title="ChatSecure screenshot" type="image/jpg"/><link rel="enclosure" href="/images/chatsecure4.jpg" title="ChatSecure screenshot" type="image/jpg"/><summary type="html">&lt;i&gt;Section: Other clients&lt;/i&gt;&lt;hr/&gt;Context: An open source and fully available on GitHub for the IOS App. Unfortunately it's designed specifically and only for IOS mobile devices which are inherently insecure due to the need for Apple's store, and their proprietary data collection methods that cannot be mitigated. In addition to a myriad of privacy risk with using wifi and cellular data plans, Apple's proprietary exclusivity to everything really. Compared to the Android clients, ChatSecure does not reveal its version, timezone, or system information - only the client name in the resource header; this makes it one of the best in terms of data leaks. Notable features that give it some grace:</summary><title>ChatSecure</title></entry><entry><author><email>digdeeper@disroot.org</email><name>DigDeeper</name><uri>xmpp:diggy@digdeeper.love</uri></author><content xmlns="http://www.w3.org/1999/xhtml" type="xhtml"><div class="section"><h2 id="summary">Summary</h2><p>Psi+ is <strong>the only client that is able to hide its identity</strong> - all other clients can be exposed by Psi+ and Gajim even after attempted mitigations. If you care about client concealement, then you have to use Psi+. Also, when I refer to the resource header, that can <strong>only be seen by MUC admins</strong>. The most important leak is the timezone, and it can be mitigated in all clients except Pidgin - so don't use it. <strong>All Android clients leak timezone unless used through TOR</strong>; they also reveal their versions. Profanity can hide everything except its name and version. ChatSecure leaks only the client name, but requires an iPhone to use it. Dino and Gajim (after mitigation) leak only the client name. I did not review any clients that don't support OMEMO, as that is the encryption that is expected today. Even though OTR is a good replacement, and isn't weaker in any relevant way - I can't justify recommending clients that don't support OMEMO, since they won't be able to have encrypted communication with popular clients that have now dropped OTR (e.g nuGajim). <strong>All clients can leak your country through your status messages</strong>, if they are in any other language than English. So, use English as your system language or turn off the messages. XMPP servers will always store your roster - the only way to avoid this is to not add anyone to the roster. </p><table><tr><td class="toprow">Client / Feature</td><td class="toprow">Psi+</td><td class="toprow">Pidgin</td><td class="toprow">Conversations</td><td class="toprow">Dino</td><td class="toprow">Profanity</td><td class="toprow">Gajim</td><td class="toprow">ChatSecure</td></tr><tr><td>OMEMO</td><td class="good">Yes</td><td class="neutral">Partial</td><td class="good">Yes</td><td class="good">Yes</td><td class="neutral">Partial</td><td class="good">Yes</td><td class="good">Yes</td></tr><tr><td>OTR</td><td class="good">Yes</td><td class="good">Yes</td><td class="bad">No</td><td class="bad">No</td><td class="good">Yes</td><td class="good">Yes (old versions)</td><td class="good">Yes</td></tr><tr><td>PGP</td><td class="good">Yes</td><td class="neutral">3rd party, didn't test</td><td class="good">Yes</td><td class="good">Yes</td><td class="good">Yes</td><td class="good">Yes</td><td class="bad">No</td></tr><tr><td>Mitigations for version</td><td class="good">Yes</td><td class="bad">No</td><td class="bad">No</td><td class="good">Yes</td><td class="good">Yes</td><td class="good">Yes</td><td class="good">Yes</td></tr><tr><td>Mitigations for timezone</td><td class="good">Yes</td><td class="bad">No</td><td class="neutral">External (TOR)</td><td class="good">Yes</td><td class="good">Yes</td><td class="good">Yes</td><td class="good">Yes</td></tr><tr><td>Mitigations for OS</td><td class="good">Yes</td><td class="good">Yes</td><td class="bad">No</td><td class="good">Yes</td><td class="good">Yes</td><td class="good">Yes</td><td class="good">Yes</td></tr><tr><td>Mitigations for client name</td><td class="good">Yes</td><td class="bad">No</td><td class="bad">No</td><td class="bad">No</td><td class="good">Yes</td><td class="neutral">Partial</td><td class="neutral">Partial</td></tr><tr><td>Onion connectivity</td><td class="good">Yes</td><td class="bad">No</td><td class="good">Yes</td><td class="bad">No</td><td class="good">Yes</td><td class="good">Yes</td><td class="bad">No</td></tr><tr><td>OS support (official)</td><td>Linux, Windows, macOS, Haiku, BSD</td><td>Linux, Windows, FreeBSD</td><td>Android</td><td>Linux, BSD</td><td>Linux, Windows, BSD, OSX, Android</td><td>Linux, Windows, FreeBSD</td><td>iOS</td></tr></table></div></content><id>summary</id><summary type="html">&lt;i&gt;Section: Summary&lt;/i&gt;&lt;hr/&gt;Context: Psi+ is the only client that is able to hide its identity - all other clients can be exposed by Psi+ and Gajim even after attempted mitigations. If you care about client concealement, then you have to use Psi+. Also, when I refer to the resource header, that can only be seen by MUC admins. The most important leak is the timezone, and it can be mitigated in all clients except Pidgin - so don't use it. All Android clients leak timezone unless used through TOR; they also reveal their versions. Profanity can hide everything except its name and version. ChatSecure leaks only the client name, but requires an iPhone to use it. Dino and Gajim (after mitigation) leak only the client name. I did not review any clients that don't support OMEMO, as that is the encryption that is expected today. Even though OTR is a good replacement, and isn't weaker in any relevant way - I can't justify recommending clients that don't support OMEMO, since they won't be able to have encrypted communication with popular clients that have now dropped OTR (e.g nuGajim). All clients can leak your country through your status messages, if they are in any other language than English. So, use English as your system language or turn off the messages. XMPP servers will always store your roster - the only way to avoid this is to not add anyone to the roster. </summary><title>Summary</title></entry></feed>